
Box Elder Maple Bonsai: Growing & Care Guide
- September 18, 2025
- By Jason Sinclair
I’ve always been drawn to the unique character of trees, and the box elder maple, or “Acer negundo”, is no exception. While sometimes overlooked, this tree offers a fantastic opportunity for bonsai enthusiasts looking for something a bit different. Its adaptability and willingness to respond to care make it a rewarding subject for shaping into a miniature masterpiece. In this guide, I’ll share my experiences and tips for growing and shaping your box elder bonsai.
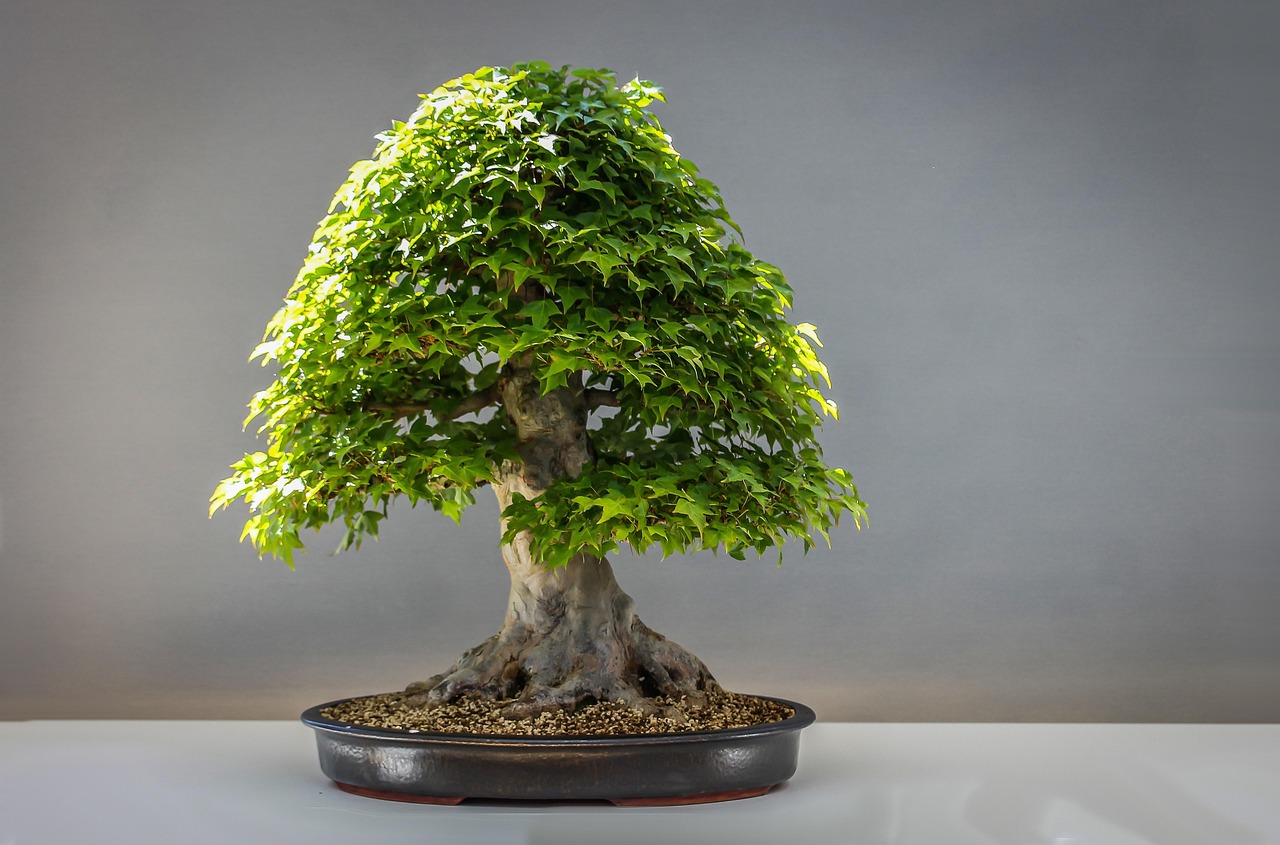
Box Elder Maple Bonsai (Acer negundo): Characteristics & Appeal
When I first started exploring the world of bonsai, the box elder maple, or Acer negundo, wasn’t the tree that immediately caught my eye. It’s often seen as a common, almost ordinary tree, sometimes even called a “weed tree.” However, I’ve come to appreciate that the box elder maple bonsai has a surprising amount of potential for those willing to put in the effort. Native to North and Central America, it’s quite adaptable, handling conditions that might be a bit tough for other maple varieties, like heat and drier soil.
What makes the box elder maple a good candidate for bonsai, in my experience, is its natural tendency towards smaller leaves. This is a big advantage because it means less work to achieve that miniature look. Plus, this tree grows pretty fast, so you can often see noticeable progress in your training relatively quickly. It’s a nice change of pace if you’re looking to develop a mature-looking bonsai without waiting for decades.
While it might not boast the vibrant fall colors or showy flowers of some other maples, the box elder has its own distinct charm. Its leaves, often naturally divided into three lobes, give it a unique appearance that can be quite striking when styled well.
Here’s a quick look at why I find the box elder maple so appealing for bonsai:
- Adaptability: It’s tough and can handle a variety of climates, including warmer and drier spells.
- Leaf Size: The leaves are naturally on the smaller side, and with good care, they can be reduced even further.
- Growth Rate: It grows vigorously, which means you can shape and develop the tree more quickly.
- Styling Versatility: I’ve found it responds well to different styling techniques, allowing for a range of aesthetic forms.
I’ve learned that this tree is quite forgiving, which is great when you’re still figuring things out. It doesn’t demand overly specific conditions, and it responds well to pruning and wiring. The ability to develop a full, well-shaped crown relatively quickly is one of its most attractive features for bonsai enthusiasts. It’s a good option if you’re looking to create a mature-looking bonsai without waiting decades.
So, while some might overlook it, I see the resilience and rapid growth of the box elder maple as definite advantages for creating compelling bonsai forms. It’s a rewarding subject for anyone looking to shape a tree with character.
Climate, Sunlight & Indoor/Outdoor Placement Needs
Box Elder Maples, or Acer negundo, are adaptable when it comes to where they like to live. I’ve found they really thrive with plenty of light. Direct sunlight for at least a few hours a day is ideal, especially morning sun. If you’re keeping it indoors, aim for your brightest window, ideally one that faces south. Think of it like this: the more light it gets, the happier and healthier your Box Elder will be. Too little light, and you’ll notice the growth getting a bit leggy, with smaller leaves. They don’t do well in dim corners, so give them a sunny spot.
When it comes to outdoor placement, they can handle full sun, but in hot climates, a little afternoon shade can prevent leaf scorch. I usually find a spot that gets good morning sun and then maybe some dappled light or shade when the sun is at its strongest in the afternoon. They’re generally hardy trees, but if you live somewhere with harsh winters and freezing temperatures, you’ll want to provide some protection for the roots, especially if it’s planted in a pot.
Here’s a quick rundown of what I look for:
- Indoors: Place within 1 foot of a south-facing window.
- Outdoors (Temperate Climates): Full sun is great.
- Outdoors (Hot Climates): Morning sun with afternoon shade is best.
I’ve noticed that the pot size really affects how quickly the soil dries out. Smaller pots, especially those used for bonsai, lose moisture much faster than larger containers. This means I need to be more attentive to watering, checking the soil more frequently, particularly during warmer months.
They aren’t fussy about specific climates as long as they aren’t exposed to prolonged, deep freezes. They’re quite resilient, which is one of the things I like about them.
Soil Types, Drainage & Repotting Best Practices
When I first started working with Box Elder maples for bonsai, I spent a lot of time figuring out the right soil and pot setup. It’s not overly complicated, but getting it right makes a big difference in how the tree grows and stays healthy. Box Elders aren’t too picky about soil, which is good news. They can handle a variety of mixes, but they thrive in something that drains well. I usually go for a mix that’s about 50% akadama, 25% pumice, and 25% lava rock. This gives good aeration and prevents water from sitting around the roots too long. Some people also use a bit of organic compost, but I keep that to a minimum, maybe 10% at most, to avoid water retention issues. The key is that the soil should be gritty and allow water to flow through freely.
For the pot itself, I’ve found that Box Elders appreciate a bit more root space than some other bonsai species. Peter Adams, a well-known bonsai artist, mentioned that maples need ‘root run,’ which I take to mean a pot that isn’t too shallow. While a very shallow pot can work for a mature tree, starting, or for younger trees, I prefer a pot that offers a bit more depth. This helps the tree establish a strong root system. For the pot’s appearance, I tend to lean towards unglazed, earth-toned pots, but glazed ones in white or blue can also look quite nice. The pot should have good drainage holes, of course. I always make sure to check the drainage holes before I pot up a tree.
Box Elders are fast growers, so I usually repot them every two years. The best time to do this is in the spring, just as the buds are starting to swell, but before they fully open. This timing helps the tree recover quickly. When repotting, I’ll trim back about a third of the root mass, focusing on removing any thick, circling roots and encouraging finer feeder roots. It’s important to make sure the soil is slightly moist when you repot, not bone dry or soaking wet.
Here’s a quick rundown of my repotting process:
- Gently remove the tree from its current pot.
- Carefully comb out the old soil from the roots, using a root hook or chopstick.
- Trim away any circling roots, thick taproots, or dead roots. I aim to remove about one-third of the total root mass.
- Prepare the new pot with a drainage screen and a layer of fresh bonsai soil.
- Place the tree in the new pot, spreading the roots out, and fill with soil, working it in to eliminate air pockets.
- Water thoroughly after repotting.
Repotting is usually best done in early spring, just before the new growth starts. This is when the tree is coming out of dormancy and can recover most quickly. I check the roots every two to three years for younger trees, and perhaps every three to five years for more established ones. If I see roots circling the pot or growing out of the drainage holes, it’s time for a repot. When repotting, I like to prune about a third of the root mass to encourage new root growth.
Watering Strategy
Getting the watering right for a Box Elder maple bonsai is important, and honestly, it took me a bit to figure out the sweet spot. The goal is to keep the soil consistently moist, but never waterlogged. Think of it like a well-wrung sponge – damp, but not dripping wet. If the soil dries out completely, especially when it’s hot, the tree can get stressed.
I always check the soil moisture before I water. My go-to method is the finger test: I just poke my finger about an inch into the soil. If it feels dry, it’s time for a drink. If I can still feel moisture, I hold off. This simple step has saved me a lot of guesswork over the years.
Here’s a general idea of how I approach watering throughout the year:
- Spring: As growth starts, I water when the top inch of soil feels dry. Consistent moisture is good during this active period.
- Summer: This is the busiest growing season. I check the soil daily, and water thoroughly whenever the top layer feels dry. In hot, windy weather, this might mean watering every day, or even twice a day.
- Autumn: As things cool down, I gradually reduce how often I water. I still make sure the soil doesn’t dry out completely, though.
- Winter: Watering becomes much less frequent. I only water when the soil is dry to the touch. If you live somewhere cold, remember to protect the roots from freezing.
When I water, I like to do a thorough soaking. I water until it runs freely from the drainage holes at the bottom of the pot. This helps flush out any accumulated salts and ensures the entire root ball gets moisture. For indoor bonsai, I’ve found that using a balanced bonsai fertilizer weekly can help maintain health and vigor, and there are some helpful videos available if you need guidance on feeding your bonsai tree.
It’s important to remember that bonsai pots, especially smaller ones, dry out much faster than regular garden pots. This means you need to be more vigilant with your checks, particularly during warmer months. Overwatering can be just as damaging as underwatering, leading to root rot, so finding that balance is key.
Pruning, Ramification & Controlling Leaf/Internode Growth
When I work on my box elder maple, pruning is a big part of getting it to look right. It’s not just about making it tidy; it’s about guiding its growth and developing that dense, twiggy look we want in bonsai. I usually split my pruning into two main types: structural and maintenance.
Structural pruning is for the bigger jobs. This is when I remove branches that are growing in a bad spot, crossing other branches, or just don’t fit the overall shape I’m aiming for. I try to make these cuts cleanly and think about where the tree will heal and grow from. It’s important to remember that once a branch is gone, it’s gone, so I try to visualize the final result before I make any major cuts. I usually do this kind of pruning when the tree is dormant, but sometimes I’ll do it during the growing season if a branch is out of place.
Maintenance pruning is more about refinement and happens throughout the growing season. This is where I pinch back new shoots. When a new shoot extends a bit, I’ll pinch it back to just one or two nodes. This encourages the tree to put out new growth from those nodes, making the branching denser and the internodes (the space between leaves) shorter. It’s a constant process of trimming back shoots that are getting too long or growing in unwanted directions. This helps create that fine branching, or ramification, that gives the tree its delicate appearance.
Sometimes, I’ll try leaf pruning, also called defoliation. This is a bit more advanced. I’ll remove all the leaves from a healthy, vigorous tree in early summer. This encourages it to grow a second set of leaves, and these new leaves are usually smaller. It’s a good way to get a finer texture and reduce leaf size, but I only do it on trees that are really strong and usually not in the same year I repot. It’s a technique that helps with ramification.
Here’s a general idea of how I manage growth:
- Pinching: Regularly pinch back new shoots to 1-2 nodes to encourage denser branching.
- Pruning: Make clean cuts on larger branches or shoots that don’t fit the design.
- Leaf Pruning: Consider defoliating a healthy tree in early summer for smaller leaves and better ramification (do this sparingly).
I find that balancing the growth is key. If one branch is growing much faster than others, I might prune it back more heavily or even wire a slower-growing branch to encourage it to catch up. It’s a constant observation and adjustment process to keep the tree looking balanced and natural.
Timing is also important. I try to do most of my structural pruning when the tree is dormant, but maintenance pruning, like pinching, happens all through the growing season. Leaf pruning is usually done in early summer on healthy trees.
Wiring, Styling & Branch Structuring for Mature Form
When I’m working on shaping my Box Elder Maple bonsai, wiring is a useful tool. It lets me guide the branches where I want them to go, helping to build the overall structure. I usually find that spring or early summer is the best time for this. The branches have grown enough to hold the wire, but they’re still flexible enough to bend without snapping. It’s important to remember that the bark on these trees can be a bit delicate, so I always try to protect it. Using raffia or paper tape when wiring is a good idea, especially on younger branches. I select anodized aluminum wire, usually about a third to half the thickness of the branch I’m wiring. I wrap it at a 45-degree angle, keeping it snug but not so tight that it digs in. I check it regularly and remove it before it starts to bite into the bark, which is typically around six months, though sometimes sooner if I notice any issues.
Beyond just bending branches, I also think about how to encourage ramification, which is basically getting more branches and finer twigging. This is where the tree starts to look mature and detailed. I do this by pinching back new growth. When a shoot extends a couple of nodes, I’ll pinch or cut it back to just one or two nodes. This encourages the tree to send out new shoots from those spots, making the branching denser. It’s a continuous process of guiding and refining the tree’s form.
Developing the nebari, or surface roots, and achieving a good trunk taper are also key to making a Box Elder look like a mature tree in miniature. For nebari, I sometimes expose the top layer of roots during repotting to encourage them to spread outwards. Creating a trunk taper, that gradual narrowing from base to top, is something I work on with younger trees. I might let the tree grow a bit more freely for a season to thicken the base, then prune it back to a lower branch, or use gentle wiring on the trunk itself to introduce a curve.
Here’s a general timeline I follow for wiring and major shaping:
- Late Winter to Early Spring: This is when I do structural pruning. I remove larger branches that don’t fit the design or branches that are growing in awkward directions. This is done before the tree starts its main growth spurt.
- Spring to Early Summer: This is my prime time for wiring. The branches have enough growth to hold the wire, and they are still pliable. I also do maintenance pruning during this period to control growth and refine the shape.
- Mid-Summer: I might do some leaf pruning every other year to encourage smaller leaves and finer twigging. I also check any wires I’ve applied and remove them if they are starting to bite into the bark.
- Late Summer to Fall: I might do some light wiring if needed, but I’m more cautious as the branches start to harden off. I focus on refining the shape and preparing the tree for winter.
When I’m encouraging ramification, I’m not just trying to make the tree look dense; I’m aiming for a natural, aged appearance. This means allowing some branches to extend and thicken appropriately, rather than pinching everything back to a tiny stub. It’s about creating a hierarchy of branches, from the main structural limbs down to the finest twigs. This layered approach gives the bonsai depth and realism. I also consider how the branches will look in winter, when the leaves are gone. Good branch structure is visible year-round.
Pest, Disease & Winter Care Challenges
When I’m looking after my box elder maple bonsai, I’ve learned that keeping an eye out for common pests and diseases is important. It’s not usually a huge problem, but you do need to be aware. Aphids are a common nuisance; they love to cluster on new growth and suck the sap, leaving leaves looking a bit sad and sticky. I also sometimes see scale insects, which look like little bumps on the branches and trunk, and they do the same thing – sap-sucking. Mites can be sneaky too, showing up as discoloration on the leaves when they’ve gotten a hold. For these little critters, I usually start with horticultural oil or insecticidal soap. It’s often enough to deal with minor infestations before they become a bigger headache.
Diseases aren’t as frequent for me, especially since I focus on good drainage and not overwatering. However, I have seen leaf spot diseases, which are usually fungal. I find that just cleaning up fallen leaves in the autumn helps reduce the chances of them coming back next year. Powdery mildew can show up as a white coating on the leaves, particularly if air circulation isn’t great. Keeping the tree healthy overall is my main defense against most issues. If I do spot something serious, I’ll look into specific bonsai pest control options.
Winter care is another area where I’ve learned a few things. My outdoor maples need protection from the cold, especially their roots, which are more vulnerable than the branches. I usually move my potted trees to a sheltered spot, like an unheated garage or against the house, before the harsh weather sets in. For trees I leave outside, I make sure to insulate the pots well, often grouping them and packing straw or bark chips around them.
It’s easy to forget about watering when it’s cold, but it’s still important. The soil shouldn’t dry out completely, even in winter. I check the soil moisture periodically, especially on warmer days when the ground isn’t frozen. If it feels dry, I’ll water them, but only when the temperature is above freezing. Overwatering when it’s cold can lead to root rot or ice damage.
I also try to acclimate my trees gradually when bringing them inside for winter or moving them back outside in spring. This helps prevent any shock from sudden temperature changes. Paying attention to these details helps my box elder maples stay healthy through all seasons.
Growth Cycles & Seasonal Care
Understanding the yearly rhythm of my Box Elder Maple is important for keeping it healthy and looking good. It’s not just about watering and pruning whenever I feel like it; there’s a definite pattern to how these trees grow and what they need at different times of the year.
My approach to seasonal care focuses on supporting the tree through its active growth, encouraging development, and allowing it to rest properly.
Here’s a breakdown of how I manage my Box Elder Maple throughout the year:
- Spring: This is when things really kick off. As soon as I see the buds starting to swell, I begin fertilizing. I use a balanced liquid fertilizer, usually diluted to half strength, and apply it every two weeks. If the tree needs repotting, early spring is the time I do it, usually before the new growth takes off. This is also a good period for any major structural pruning to shape the tree. Once new shoots appear, I start pinching them back to encourage finer branching.
- Summer: This is the peak growing season. I continue with regular fertilizing, sticking to that bi-weekly schedule. Maintenance pinching is also ongoing to control growth and promote ramification. I keep a close eye out for any pests or diseases during this time. Wiring can be done now, but I’m always careful about the bark, especially on younger branches, to avoid damage.
- Autumn: As the weather cools, I start to ease up on watering. The goal is to keep the soil from drying out completely, but I’m not watering as frequently. I also stop fertilizing about a month before the first frost is expected. This helps the tree prepare for winter. I’ll clean up any fallen leaves around the base.
- Winter: This is the resting period. If my Box Elder is outdoors, I make sure it’s protected from harsh freezes. Watering is minimal; I only water if the soil feels dry to the touch, just enough to prevent it from drying out completely. Winter is also a great time for me to look at the tree, plan for the next growing season, and think about any styling adjustments I might want to make.
It’s about working with the tree’s natural cycles. Trying to force growth when it wants to rest, or neglecting it when it’s actively growing, just doesn’t work out well in the long run. Patience is key; letting the tree tell me when it’s ready for the next step has been my best guide.
I find that coordinating root pruning with branch pruning is also beneficial. This way, the root system isn’t overwhelmed trying to support a canopy that’s too large for it. Balancing these two aspects is important for the tree’s overall vigor and health.
Frequently Asked Questions
What are the main things I need to do to care for a Box Elder Maple bonsai?
I’ve found that Box Elders are pretty easy to care for. They like a good amount of sunlight, but I make sure they don’t dry out completely. I check the soil regularly; if the top inch feels dry, it’s time to water. They aren’t too fussy, which is great for beginners like me.
How do I pick a good Box Elder maple to start with for bonsai?
When I’m looking for a tree, whether it’s a young seedling or one from a nursery, I check for a healthy root system and a decent trunk. Nursery stock is often a good place to begin because the tree is already established. I always look at the overall health and how strong the plant seems.
What kind of soil and pot works best for my Box Elder bonsai?
I prefer a soil mix that drains well but still holds some moisture. A common bonsai soil mix, often made of things like akadama, pumice, and lava rock, works great for me. The pot needs to be the right size for the tree’s roots and must have good drainage holes.
When should I prune my Box Elder maple bonsai?
I usually do the bigger pruning jobs in late winter or early spring, just before new growth starts. This helps me shape the tree and get rid of branches I don’t want. During the growing season, I’ll pinch back new growth to keep the tree looking neat and tidy.
How often do I need to repot my Box Elder maple bonsai?
I generally repot my Box Elder maples every two to three years. The best time for this is in early spring, right when the buds are starting to swell. When I repot, I trim about a third of the roots to help them grow healthier.
How can I shape a Box Elder maple bonsai using wire?
I’ve learned that the branches on these trees are quite flexible, making them good for wiring. I usually wire them during the growing season. It’s important to wrap the wire carefully and not too tightly, and I check it often to make sure it doesn’t cut into the bark as the tree grows.