
How to Grow a Black Walnut Tree from Seed
- August 22, 2025
- By Jason Sinclair
I’ve always been fascinated by the idea of growing my trees, and the black walnut is a particularly rewarding one to try. Its nuts are delicious, and the wood is valuable. If you’re curious about growing a black walnut tree from seed, I’m happy to share what I’ve learned. It’s a process that requires a bit of patience, but the results are well worth the effort. Let’s get started on this journey together.
Key Takeaways
- Harvesting black walnuts when they naturally fall from the tree in late summer ensures the seed has fully developed.
- Testing seed viability by floating nuts in water and discarding those that float is a simple first step.
- Cold stratification, or winter sowing, is necessary to break the seed’s dormancy and prepare it for germination.
- Planting seeds 1-2 inches deep in well-draining soil, in a location with full sun, is ideal for successful growth.
- Protecting young seeds and seedlings from squirrels and deer using physical barriers is important for their survival.
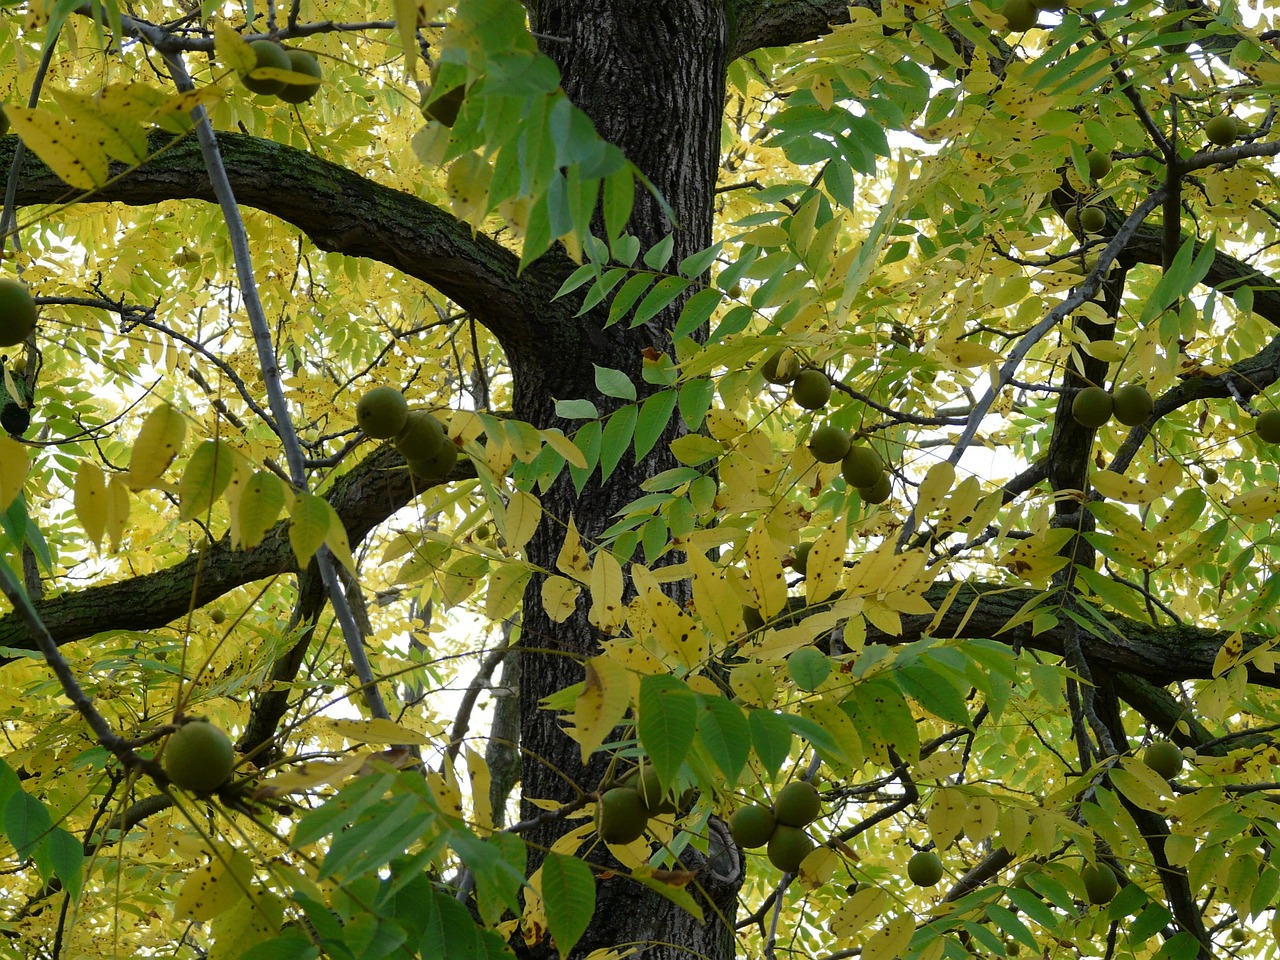
What Is a Black Walnut Tree?
When I first started thinking about growing my black walnut trees, I wanted to understand what made them so special. It turns out, these trees are quite remarkable, and not just for the nuts they produce. They’re native to North America, and people have valued them for centuries.
The black walnut, scientifically known as Juglans nigra, is a deciduous tree that’s a real treasure in the landscape. It’s a member of the Juglandaceae family, which also includes hickories and pecans. These trees can get pretty big, often reaching heights of over fifty feet, and they’re known to live for a good long while – sometimes up to 150 years. They’re monoecious, meaning a single tree has both male and female flowers, which is pretty neat for reproduction.
Key Facts About Black Walnut Trees
- Native Range: Primarily eastern North America.
- Mature Size: Can grow over 50 feet tall with a wide canopy.
- Lifespan: Often live 150 years or more.
- Growth Rate: Generally considered slow growers, especially in their early years.
- Juglone Production: They release a chemical called juglone from their roots and leaves, which can inhibit the growth of many other plants nearby. It’s something to keep in mind when planning your garden.
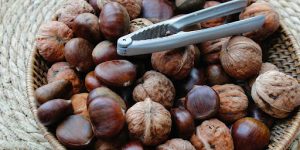
Benefits of Black Walnut Trees
There are several reasons why people are drawn to black walnut trees. For starters, the nuts themselves are a fantastic food source. They have a rich, earthy flavor and are packed with nutrients. Walnuts are a nutrient-dense food, rich in omega-3 fatty acids, antioxidants, and fiber. These properties contribute to supporting heart health, brain function, and weight management. Enjoying walnuts can be a tasty way to boost your overall well-being.
Beyond the nuts, the timber from black walnut trees is highly prized. It’s known for its deep, rich color, its strength, and its stability, making it a top choice for furniture, cabinetry, and even gunstocks. Historically, the wood was so valuable that during World War II, there were programs encouraging people to donate their backyard walnut trees for the war effort. Even the hulls have a use; they can be processed to create a natural wood stain with a lovely brownish-gray hue.
It’s interesting to note how much the availability of black walnut timber has changed over time. Early on, there were vast stands of these trees. However, due to extensive harvesting for lumber and other uses, the supply has dwindled significantly. This scarcity has driven up the value of the wood and also spurred efforts to cultivate more black walnut trees. Planting them now is an investment in future resources.
When and Where to Harvest Black Walnut Seeds for Best Results
When I decided to start growing black walnut trees from nuts, the first thing I needed to figure out was when and where to get the best seeds. It turns out, timing and location are pretty important for this whole process.
Timing Your Harvest
I learned that the best time to collect black walnuts is generally in the late summer to early fall. You want to wait until the nuts start to naturally fall from the tree. While you might see them earlier, the seeds inside might not be fully developed yet. Patience is key here; letting them stay on the tree as long as possible ensures the embryo has had enough time to mature. I usually start checking around mid-August and continue through September, depending on the weather that year.
Selecting the Right Tree and Location
When I’m out looking for walnuts, I try to find a healthy tree. A tree with a straight trunk and a full, vigorous crown is usually a good sign. Sometimes, local foresters or people who buy hardwood can point you toward good specimens. Black walnut trees tend to grow best in bottomlands, along streams, in open fields, or at the edges of forests. They like full sun and soil that’s deep, rich, moist, and drains well. I’ve noticed they don’t do as well in rocky or clay-heavy soil, or if something is blocking their roots from going deep.
Gathering More Than You Think You’ll Need
It’s a good idea to gather more nuts than you think you’ll need. The germination rate for black walnuts can vary quite a bit, sometimes anywhere from 40% to 90%. So, if I want to plant, say, ten trees, I’ll aim to collect at least twenty nuts, maybe even more, just to be safe. This way, I increase my chances of having enough viable seeds to get the number of trees I’m hoping for. It’s better to have extras than to come up short.
When collecting, it’s best to pick nuts directly from the tree if possible, or from the ground right beneath it, rather than from areas where they might have rolled or been buried by animals. This helps ensure you’re getting the freshest, most viable seeds.
How to Remove the Husk Safely and Cleanly
After you’ve gathered your black walnuts, the next step is dealing with that tough outer husk. It’s a bit messy, but getting it off cleanly is important for the seed’s health.
Tools and Preparation
First off, you’ll want to wear some gloves. Seriously, that husk has a potent dye in it that will stain your hands a lovely shade of brown for days. A sturdy pair of work gloves or even old kitchen gloves will do the trick. You’ll also need a good, sharp knife – a paring knife or a utility knife works well. A cutting board or a piece of scrap wood is also a good idea to protect your surfaces.
The Husk Removal Process
There are a few ways to tackle this, but I find a direct approach works best. Place a walnut on your cutting board. Carefully insert the tip of your knife into the husk, aiming to cut down to the hard shell underneath. Once you’ve made an initial cut, you can often work the knife around the husk, or even use your gloved hands to peel it away. Some people find that letting the nuts sit for a few days in a bucket can soften the husk, making it easier to remove. If you do this, keep them somewhere safe from critters.
- Wear gloves to prevent staining.
- Use a sharp knife for easier cutting.
- Work on a stable surface like a cutting board.
- Peel or cut the husk away from the hard shell.
Be patient with this step. Some husks are tougher than others, and it might take a bit of wiggling and careful cutting to get them off without damaging the inner shell. It’s better to take your time here than to risk cracking the actual nut.
Cleaning the Nuts
Once the husk is off, you might notice some residue left on the shell. It’s a good idea to rinse the nuts under running water. You can even soak them for a bit and change the water a few times to get them as clean as possible. This helps remove any lingering husk material or sap. After rinsing, I usually spread them out on a towel to dry a bit before moving on to the next step, which is checking if they’re even viable. You can find more information on preparing seeds at Tree Arborist Grand Rapids.
Testing Seed Viability with a Float Test
After you’ve dealt with the husks, it’s time to figure out which of those nuts are likely to grow into a tree. Not every nut that falls from the tree is a winner, unfortunately. Sometimes insects get in there, or the embryo just doesn’t develop right. A simple way to get a good idea of what’s viable is the float test. It’s pretty straightforward and uses basic physics.
How the Float Test Works
Good, healthy seeds tend to be denser. When you put them in water, they sink. Bad seeds, maybe because they have air pockets inside from insect damage or an underdeveloped embryo, are usually lighter and will float. So, if a nut floats, I usually set it aside.
Performing the Float Test
Here’s what I do:
- Get a bucket or a large bowl and fill it with water.
- Gently place your cleaned black walnuts into the water. Don’t just dump them in; try to put them in one by one.
- Let them sit for about 60 seconds. You might see some bobbing around right away.
- After a minute, check which ones have sunk to the bottom and which ones are still floating or suspended in the water.
- The ones that sink are your potential winners. I usually pull them out, dry them off, and keep them for the next steps. The ones that float? I generally don’t bother with them, though some folks leave them for up to 24 hours just to be sure before discarding.
It’s important to remember that this test isn’t foolproof. A nut that sinks isn’t guaranteed to sprout, and very rarely, one that floats might still be okay. However, it’s a good way to sort out the majority of the duds and improve your chances of success. It helps me decide how many seeds I might need to plant to get a few good trees, kind of like how you’d plan for growing American Basswood seeds.
What to Do with the Results
Once I have my batch of sinkers, I’ll often crack open a few of them just to see what the inside looks like. If the inner material is white and solid, that’s a good sign. If it’s shriveled, discolored, or smells off, that confirms my suspicion that it wasn’t a good nut. This internal check helps me estimate my germination rate, which is useful for deciding how many seeds to plant later on. If my float test shows a lot of floaters, I know I’ll need to gather more nuts than I initially thought.
Cold Stratification
Black walnut seeds have a natural dormancy that keeps them from sprouting too early. To get them to germinate, I need to mimic the conditions they’d experience over winter. This process is called cold stratification. It tells the seed that winter has passed and it’s safe to start growing.
Preparing for Stratification
First, I make sure my seeds have passed the float test, meaning they’re viable. Then, I get a plastic bag, like a zip-top one, and some damp material. Sand or vermiculite works well. I mix it with water until it’s just moist – if I squeeze a handful, only a few drops of water should come out. Too wet and the seeds might rot.
The Stratification Process
I place the viable walnut seeds into the damp sand or vermiculite inside the bag. Then, I seal the bag and put it in the refrigerator. The goal is to keep the seeds cold and moist for a period of time. This is a lot like what happens when you stratify nuts naturally outdoors, but it gives me more control.
- Duration: I aim for about 90 to 120 days in the fridge. This period is important for breaking the seed’s dormancy.
- Temperature: The ideal temperature is around 35-40°F (1-4°C), which is typical for a refrigerator.
- Checking: I check the bag every few weeks to make sure the sand or vermiculite hasn’t dried out. If it looks dry, I’ll add a little more water.
This cold, moist treatment is what signals the seed to prepare for germination. It’s a simple but effective way to trick the seed into thinking it has survived a winter.
After the stratification period is over, usually in late winter or early spring, the seeds should be ready to plant. I’ll take them out of the refrigerator and plant them directly into pots or the ground, following the planting depth guidelines.
Alternative
Instead of bringing the seeds inside to stratify them in the fridge, I sometimes opt for a simpler approach: direct sowing in the fall. This method lets nature handle the cold stratification process for us. It’s a pretty straightforward way to get the seeds ready for spring germination.
When I do this, I’m essentially planting the seeds right where I want the tree to grow. This avoids the need to transplant them later, which can sometimes stress young trees. The key is to get them into the ground before the soil freezes solid, usually sometime in November or December. This timing is important because it gives the seeds the necessary cold, moist period they need to break dormancy.
Here’s how I typically go about it:
- Prepare the Site: I chose a spot that gets good sunlight and has well-draining soil. I make sure the area is clear of weeds and debris.
- Plant the Seeds: I dig a hole about 2 inches deep and place the viable walnut seeds inside. If I’m planting multiple seeds in one area, I space them out a bit to make thinning easier later on.
- Protect the Seeds: This is a big one. Squirrels and other critters love black walnuts. To keep them from digging up my seeds, I usually cover the planting spot with a piece of hardware cloth or chicken wire, securing it with a rock or a heavy object. This makes it difficult for them to get to the nuts.
This method relies on the natural freeze-thaw cycles of winter to help the seeds germinate in the spring. It’s a hands-off approach that can be quite effective.
The beauty of direct sowing in the fall is that it mimics how these trees would naturally propagate. The seeds fall, get covered by leaves and soil, and then experience the winter cold, all setting the stage for spring growth. It’s a time-tested method that requires minimal intervention from my end.
I find that this approach works well, especially if I’ve already done the float test to ensure I’m planting viable seeds. It saves a step compared to indoor stratification and lets the environment do the work. You can find more details on preparing your seeds for planting on the pages about seed preparation.
Choosing the Right Planting Site
Choosing the right spot for your black walnut seed is pretty important. I learned that the hard way when I tried planting one too close to my tomatoes, and well, let’s just say the tomatoes didn’t do so hot. Black walnuts give off something called juglone from their roots, and it’s not friendly to a lot of other plants. You’ll want to keep them away from things like pines, potatoes, blackberries, and apples. It’s a bit of a balancing act.
So, what makes a good home for a young walnut?
- Sunlight: These trees like their sun. I aim for a spot that gets at least six to eight hours of direct sunlight every day. It makes a big difference in how well they grow.
- Soil: The soil needs to be of good quality, with plenty of organic matter, and it has to drain well. If water sits around the roots, that’s no good. I try to dig down a bit to check the drainage before I commit to a spot. You want soil that’s deep enough for the roots to spread out, ideally without hitting rock or dense clay too soon. A slightly loamy soil is usually best.
- Spacing: Give them room! If you’re planting more than one, or if you have other trees nearby, you’ll want to think about how big they’ll get. I usually space them out quite a bit, maybe 50 feet or more, to avoid competition later on.
It’s also worth considering where the parent tree came from. If you can find nuts from a tree that’s grown in a similar climate to yours, or even a bit further north, that’s usually a good sign for how well your new tree will handle the local weather. I found some great info on growing walnut trees that touched on this.
When I’m picking a spot, I’m looking for a place that’s open and gets plenty of light. I also try to avoid areas where water tends to pool after it rains. It’s a bit of trial and error, but paying attention to these details early on sets the stage for a healthy tree down the road.
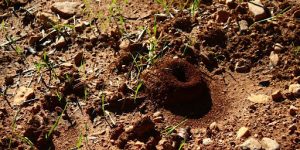
Planting Depth and Techniques for Successful Germination
Alright, so you’ve got your stratified black walnut seeds ready to go. Now comes the part where we get them into the ground. It’s not super complicated, but doing it right makes a big difference.
Planting Depth
For black walnuts, I’ve found that planting them about 1 to 2 inches deep works best. Any shallower, and they might dry out too easily or get dug up by critters. Too deep, and the little sprout might have a hard time pushing its way to the surface. It’s a bit of a balancing act, but that 1-2 inch range is usually the sweet spot.
Planting Techniques
When you’re ready to plant, whether you’re putting them directly into the ground or pots, here’s what I usually do:
- Prepare the Spot: Make sure the soil is moist but not waterlogged. If you’re planting in the ground, loosen the soil a bit where you plan to put the seed.
- Place the Seed: Put the stratified seed in the hole or pot. If you’re planting multiple seeds in one spot (which I sometimes do, just in case), try to space them out a little within that planting area.
- Cover Up: Gently cover the seed with soil, making sure you’re hitting that 1-2 inch depth mark. Lightly pat the soil down, but don’t pack it too hard.
- Water Gently: Give the area a light watering. You want the soil to be moist, but you don’t want to wash the seed away.
If you’re planting multiple seeds in the same general area, it’s a good idea to think about how you’ll thin them out later. You don’t want a whole bunch of walnut trees all crammed together. It’s better to have a few strong ones than many weak ones.
Remember to protect your newly planted seeds. Squirrels are notorious for digging up anything that looks remotely like a snack. Using something like wire mesh over the planting spot can help deter them. You can find some good tree protection options at local garden centers.
If you’re planting in the fall, you’re letting nature do the stratification for you. Just plant them about 2 inches deep in moist soil. If you stratify them indoors and are planting in the spring, the same depth applies. Just keep an eye on the moisture levels and be patient. Germination usually happens when the soil temperatures start to warm up consistently.
Protecting Seeds and Seedlings from Wildlife Pests
Squirrels and Other Critters
Squirrels are probably the biggest nuisance when you’re trying to get black walnut seeds to sprout. They have a knack for finding them, no matter how well you think you’ve buried them. One effective method to deter these furry thieves is to cover each planting spot with a piece of heavy wire mesh, about 18 inches square. Another trick I’ve heard of involves using cleaned tin cans. You burn off the coating, then place the can over the seed, leaving the sharp points of the lid sticking up. It’s a bit of work, but it can save your seeds.
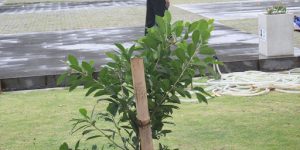
Deer and Other Larger Animals
Deer can also be a problem, especially for young seedlings. They might rub their antlers on the saplings during the fall rut, or even browse on the tender leaves. For this, plastic tree shelters or cages are a good idea. I use them for most of my young trees, and they seem to do the trick. They provide a physical barrier that discourages rubbing and browsing.
Protecting Your Seeds and Seedlings
- Wire Mesh: Place an 18-inch square of heavy wire mesh over each cluster of buried nuts. This makes it harder for squirrels to dig them up.
- Tin Can Collars: Clean tin cans (remove bottoms, leave sharp points on lids) can be placed over seeds as a protective collar.
- Tree Shelters/Cages: Use plastic tree shelters or wire cages around young seedlings to protect them from deer and other browsing animals.
- Avoid Fertilizing: Don’t fertilize the planting area. This can encourage weed growth, which will compete with your young trees for resources. It’s better to let the trees establish themselves first.
When planting seeds, remember that competition from weeds can set back your young trees. Keeping the area around them clear for the first few years is important for their survival and growth. Mulching or regular cultivation can help manage weeds effectively.
If you’re planting seeds, you might want to check out resources on black walnut seed pods for more information on harvesting and preparation.
Germination Expectations
So, you’ve gone through all the steps, and now you’re probably wondering when you’ll see some green shoots popping up. It’s a bit of a waiting game with black walnuts, and patience is key here. My own experience has shown that germination can be a bit unpredictable, but with the right preparation, you can expect a decent success rate.
Germination Timeline
After you’ve completed the cold stratification process, which typically lasts around 120 days, you can expect germination to occur in the spring. Once the soil temperatures start to warm up consistently, usually in mid-spring, you should begin to see signs of life. The actual sprouting can take anywhere from 30 to 45 days after the stratification period is complete and the seeds are planted. So, if you started stratification in the fall, you’re looking at germination happening in the spring, potentially a few months later.
Expected Success Rates
When it comes to how many seeds will sprout, it depends on the quality of your seeds and how well you followed the stratification and planting instructions. I’ve found that if you start with viable seeds, meaning they passed the float test and had good meat inside, you can aim for a germination rate of about 80-90%. However, in my attempts, I’ve seen rates closer to 60% in the first year. It’s not uncommon for some seeds to take a second year to germinate, especially if the stratification wasn’t perfectly consistent or if the planting conditions weren’t ideal. This is why it’s often recommended to plant a few seeds per spot, just to increase your chances of getting at least one healthy seedling.
It’s important to remember that not every single seed will sprout. Nature has its way of doing things, and sometimes seeds just don’t make it. Don’t get discouraged if you don’t see a 100% success rate; focus on the ones that do sprout and give them the best care you can.
Factors Affecting Germination
Several things can influence whether your black walnut seeds decide to sprout:
- Seed Viability: As we discussed, using seeds that are alive and healthy is the first step. The float test is a good indicator, but cracking a few open to check the kernel is even better.
- Stratification: Proper cold and moist stratification is non-negotiable. If the seeds don’t get that cold period, they won’t break their dormancy.
- Planting Depth and Soil: Planting them too deep or too shallow, or in soil that’s too wet or too dry, can hinder germination.
- Pests: Squirrels and other critters have a taste for walnuts, and they might dig them up before they even have a chance to sprout. Protecting your planted nuts is a big part of the process. I’ve had to use chicken wire covers to keep the squirrels from raiding my planting spots, which you can find more about when learning how to harvest black walnut seed pods.
- Temperature Fluctuations: While consistent warmth helps once stratification is done, extreme temperature swings can sometimes be an issue.
Caring for Seedlings
Watering Needs
Once your black walnut seedlings have sprouted, keeping them consistently moist is key. I’ve found that a good watering schedule means the soil should feel damp, but not waterlogged. Think of it like a wrung-out sponge. For the first year, I aim to water them deeply about once a week, especially if we’re not getting much rain. If you’re using mulch, which I highly recommend, it helps keep that moisture in. Just be careful not to let water pool around the base of the seedling, as that can lead to rot.
Weed Control is Paramount
This is a big one, and honestly, it’s where I’ve seen the most success or failure with young trees. Black walnuts don’t like competition, especially when they’re just starting out. For the first three years, I try to keep a clear, weed-free zone of about three to four feet around each seedling. This means regular weeding by hand or using a hoe. If you’re looking for a less labor-intensive method, black plastic mulch can be a real game-changer. You just lay it down, cut a small slit for the seedling, and poke a few holes for water. It blocks the sun from weeds but lets the rain in. I’ve also used wire mesh laid over the planting site before shoots appear to deter squirrels, and it seems to help keep weeds down a bit, too.
Fertilizing: Less is More (Initially)
It might seem counterintuitive, but I’ve learned not to fertilize black walnut seedlings right away. Adding fertilizer early on can encourage weed growth more than it helps the young tree. The idea is to let the seedling focus its energy on establishing its roots. Once the tree is a bit more established, say after its first year or two, I might consider a light application of a balanced fertilizer, but only if the soil seems to be lacking. It’s better to focus on good soil and consistent watering in the beginning. If you’re curious about soil health, you might want to look into local tree care advice.
Protecting Your Young Trees
Squirrels can be a real nuisance, and I’ve had them dig up perfectly good nuts right after planting. To keep them from disturbing the seeds or young seedlings, I’ve had success placing a square of heavy wire mesh over the planting spot. Another trick I’ve heard of is using cleaned tin cans with the sharp edges facing upwards around the base of the seedling. Deer can also be an issue, especially in the fall when they rub their antlers. For them, I’ve found that tree shelters or cages offer good protection. It’s a bit of extra work, but it pays off in the long run for the health of your young walnut trees.
Transplanting Seedlings or Pruning Extras for Strongest Trees
Selecting the Strongest Seedlings
Once your black walnut seeds have successfully germinated and grown into small seedlings, it’s time to think about which ones have the best chance of becoming robust trees. I usually look for seedlings that have a single, strong central leader and a good root system. If you started with more seeds than you have space for, or if some seedlings are weaker than others, this is the point where you’ll need to make some decisions. It’s better to have a few strong trees than many struggling ones.
Pruning for a Straight Trunk
One of the most important things you can do for your young black walnut trees is to encourage a straight, clear trunk. This is especially important if you’re hoping to grow trees for timber, as veneer-quality wood comes from logs with long, knot-free trunks. I’ve found that the best time to address any forking or crookedness is when the seedlings are about a year old, typically between May and July. If a seedling is forking, meaning it’s splitting into two main leaders, I gently tie the bases of the two branches together with some soft cloth or tape. Then, I prune the tip of the weaker shoot back to where it’s tied to the stronger one. This helps guide the growth into a single, dominant leader. If the main shoot has been damaged, perhaps by frost or an animal, I select the strongest shoot growing nearby to become the new top and prune away the rest. It’s important to make these cuts cleanly, right at the stem, so the wound can heal properly and prevent rot.
Thinning Your Stand
If you planted multiple seeds close together, you’ll eventually need to thin them out to prevent overcrowding. Black walnuts need a good amount of space to grow to their full potential. Planting them with about 30 feet by 30 feet spacing is a good target for optimal growth and future nut production. If your trees are too close, they’ll compete for sunlight, water, and nutrients, which can slow down their growth. I usually wait about eight to ten years before I even consider thinning, but when I do, I remove the weaker, deformed, or diseased trees first. This gives the remaining trees the space they need to develop strong crowns and thick trunks. It might feel a bit harsh to remove perfectly healthy trees, but it’s for the long-term health and value of the ones you keep.
Transplanting Seedlings
Sometimes, you might have seedlings that are growing too vigorously in their initial spot, or perhaps you want to move them to a more permanent location. When transplanting, it’s best to do this when the seedlings are still relatively young, ideally in the spring or fall when the weather is cooler and the soil is moist. Dig a wide enough hole to capture most of the root system, being careful not to damage the taproot. I like to keep the root ball intact as much as possible. Once you’ve moved the seedling to its new spot, water it thoroughly. If you’re planting multiple trees for timber, remember that spacing is key. Aim for a grid of 10′ x 10′ or 12′ x 12′ if you’re planting them relatively close for initial management, but eventually, they’ll need much more room, up to 30 feet by 30 feet spacing for mature trees. This careful selection and pruning process is what helps ensure you end up with strong, healthy black walnut trees.
Long-Term Growth Tips
So, you’ve got your little black walnut seedling growing. That’s awesome! But getting it to sprout is just the first step. To get a good tree, one that might even be valuable someday, you need to think about how it grows over the years. It’s not just about planting and forgetting.
Pruning for a Straight Trunk
One of the biggest things is shaping the tree. Black walnuts are grown for their wood, and the best wood comes from a nice, straight trunk with no branches for a good length. I’ve found that after about three years, my saplings are usually around eight to ten feet tall and an inch or so thick. This is a good time to start what they call ‘clear-stem pruning’. You’re cutting off the lower branches. You want the main part of the trunk, the ‘bole’, to be as long as possible. A tree that has branches starting way up high is worth a lot more than one that’s bushy from the ground up. When I prune, I try to cut off branches on the lower half of the tree. If a sapling is ten feet tall, I’ll remove branches below the five-foot mark. Make the cuts clean, right against the trunk. A few weeks later, I go back and snip off any new little shoots that try to grow where I cut.
Ongoing Pruning Schedule
I repeat this process every few years. Every three to five years, I’ll go back and prune off more of the lower branches. The key is to cut them off before they get too big, like an inch in diameter. If they get bigger, they leave knots in the wood, and that’s not good for the value of the timber. It’s a bit of a chore, but it makes a difference in the final tree shape. Some folks even plant shrubs like autumn olive nearby. It can help block low branches naturally and also adds nitrogen to the soil, which the walnuts like. It’s a neat trick to help the tree grow strong.
Thinning Your Stand
After about eight to ten years, if I planted them fairly close together, like ten feet apart, the trees will start to get crowded. When that happens, their growth can slow down. This is when I have to think about thinning. I’ll look for trees that are crooked, diseased, or just not growing well. I remove those first. Then, I make sure the remaining trees have enough space so their crowns can spread out without bumping into each other. It’s tough to cut down a tree you’ve worked on, but it helps the ones you keep grow much better. It’s all about getting the best possible trees in the end. If you’re looking for information on tree services, you might find resources in places like Wyoming, MI.
Dealing with Forking and Damage
Sometimes, a young tree might start growing two main leaders, or it might get damaged. If a tree is forking, I tie the two main branches together with some soft tape or cloth. Then, I’ll prune the tip of the weaker one back to where they’re tied. This encourages the stronger one to take over. If the very top of the tree gets damaged, maybe by frost or an animal, I pick one of the strong shoots growing nearby to be the new top and cut off the rest. Always make clean cuts so the tree can heal properly. You don’t want rot getting in there.
Want your trees to grow strong and healthy for years to come? Just like a young plant needs the right care to become a big tree, your trees need attention too. We can help you give them the best start and keep them thriving. Visit our website to learn more about how we can help your trees grow tall and strong.
Frequently Asked Questions
When is the best time to collect black walnuts for planting?
I have found that the best time to gather black walnuts for planting is in late summer or early fall, right when they naturally start to fall from the tree. It’s important to wait until they’ve fully developed on the tree to ensure the seed inside is ready. Trying to pick them too early means the little embryo inside might not be fully grown yet.
How can I tell if a black walnut seed is likely to grow?
To check if a walnut is good for planting, I do a simple float test. I put the nuts in water, and the ones that sink are usually the ones that will grow. The ones that float are often empty or not good. It’s a pretty reliable way to sort them out before I put them in the ground.
What does ‘cold stratification’ mean for black walnut seeds?
Black walnut seeds need a period of cold and moisture to wake them up and get them ready to sprout. I usually achieve this by either planting them outside in the fall, letting nature do the work over winter, or keeping them in a damp, cold place in my refrigerator for a few months. This process is called cold stratification.
Can I just plant the black walnuts outside in the fall instead of stratifying them indoors?
Yes, I’ve had success planting black walnuts directly in the fall. This way, they experience the natural cold and wet conditions of winter right in the soil. It’s a simpler method because you let nature handle the stratification part for you.
What kind of spot should I choose to plant a black walnut seed?
I look for a spot that gets plenty of sunshine, ideally full sun. The soil needs to be of good quality, like rich topsoil that drains well. I also make sure there’s enough space for the tree to grow, as walnut trees can get quite big with deep roots. I usually plant them at least 10-12 feet apart.
How deep should I plant a black walnut seed?
I plant the black walnuts about 1 to 2 inches deep in the soil. After placing the nut, I cover it with soil and pat it down gently. If I’m planting more than one in the same area, I try to space them out a bit so they don’t compete too much later on.
What are the common pests that bother black walnut seeds and seedlings, and how can I protect them?
Squirrels are a problem! They love to dig up the nuts, even after planting. I’ve found that putting a wire mesh screen or hardware cloth over the planted area, maybe with a rock on top, works well to keep them out. Deer can also be an issue for young seedlings, so I sometimes use tree shelters or cages for them.
When can I expect my black walnut seeds to start growing?
I usually see germination happen in the spring, once the weather starts to warm up consistently. My own experience has shown germination rates around 60% in the first year, but it can vary. It’s important to be patient, as it can take a little while for them to sprout.