
How to Plant a Redbud Tree from Seeds in Your Garden
- November 20, 2025
- By Jason Sinclair
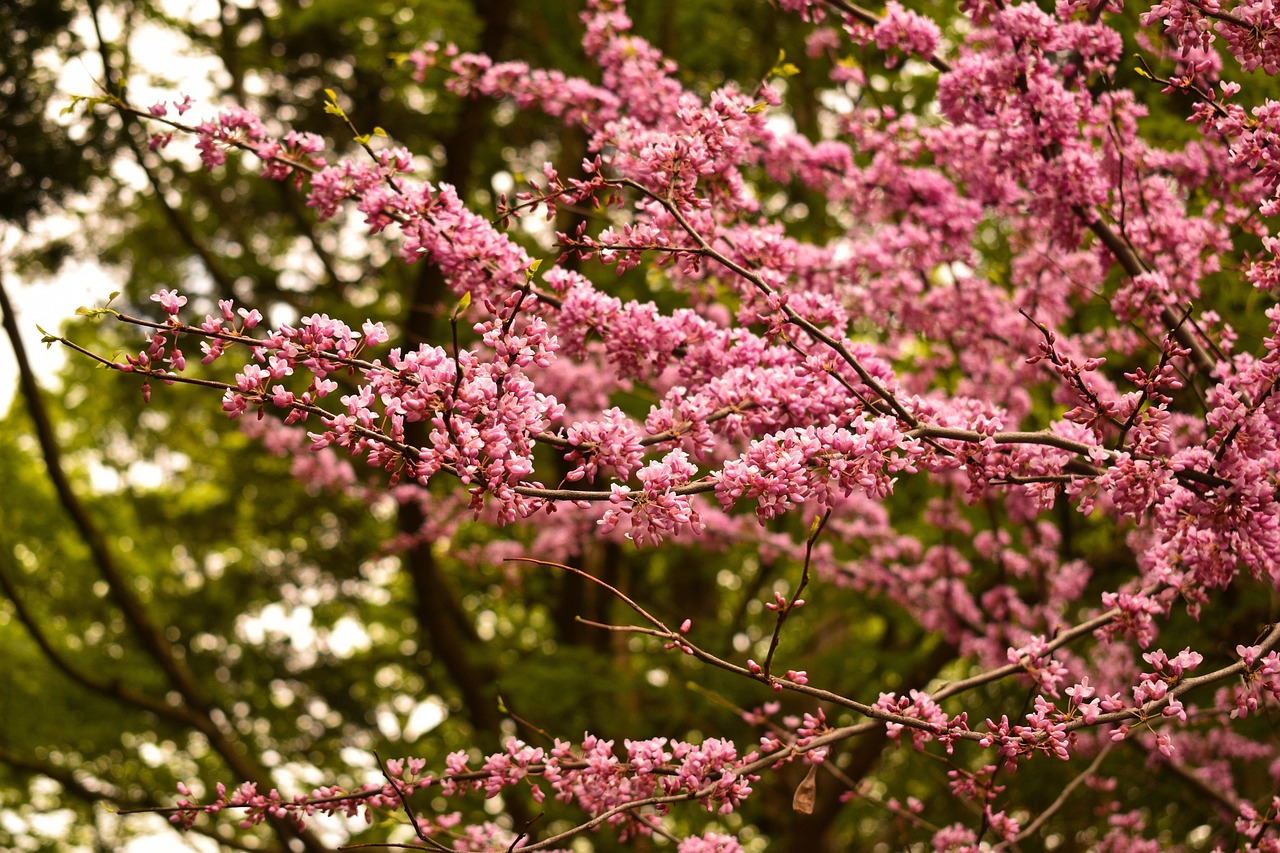
So, you’re thinking about how to plant a redbud tree from seed? That’s fantastic! These trees are truly something special, especially in the spring when they burst with gorgeous, pinkish-purple flowers right on their branches. They’re native to North America and can grow to be about 25 to 30 feet tall with a similar spread. I’ve found they look great as a standalone ornamental tree in a yard, and they’re a much better choice than some of those invasive pear trees out there. I will share with you my experience onhow to plant a redbud tree easily and simply.
Understanding Redbud Trees and Their Growing Conditions
When it comes to where they like to grow, redbuds are pretty adaptable. They can handle full sun, which is great for getting the most blooms, but if you live somewhere with really hot summers, a little bit of afternoon shade can be a lifesaver for the tree. So, think about full sun to partial shade when you’re picking a spot. They’re not super picky about soil, but they definitely prefer it to drain well. Soggy roots are a no-go for these guys.
Here’s a quick rundown of what they generally like:
- Sunlight: Full sun to partial shade.
- Soil: Well-draining is key.
- Water: Moderate watering, especially when they’re young.
- Temperature: They’re pretty hardy once established, but protecting very young seedlings from harsh conditions is a good idea.
Redbuds are also a wonderful source of early nectar for pollinators, which is a nice bonus for your garden ecosystem. Plus, their heart-shaped leaves are quite attractive throughout the growing season, turning a lovely yellow in the fall.
Getting them started from seed takes a bit of patience, but it’s a really rewarding process. You’ll want to mimic their natural conditions as much as possible to give them the best start. I’ve learned that understanding these basic needs is the first step to success when you’re trying to grow your own redbud.
Collecting and Preparing Seeds for Germination
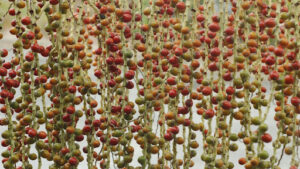
So, you’re thinking about how to plant a redbud tree? Alright, and you’ve decided to grow a redbud from seed. That’s a fantastic choice! The first step, naturally, is getting your hands on those seeds. You can buy them, sure, but I find it’s much more rewarding to collect them yourself. Plus, seeds from a local tree are already adapted to your climate, which is a nice head start. Look for seed pods after the tree has flowered and the pods have dried out, usually in the fall. They’ll be brown and brittle.
Once you’ve gathered your pods, it’s time to extract the seeds. I usually just break open the pods and shake them out. You might get a decent number of seeds from a few pods. The goal here is to get seeds that are plump and look healthy; bigger seeds often have a better chance of sprouting.
Now, redbud seeds have a really tough outer shell. This is nature’s way of protecting them, but it also means water has a hard time getting in to start germination. We need to help them out a bit. This process is called scarification, and there are a couple of ways to go about it.
Here’s a method that has worked really well for me:
- Boiling Water Soak: Take your seeds and put them in a heatproof container, like a ceramic mug. Boil some water and then pour it over the seeds, just enough to cover them. Let them sit in this hot water for about 24 hours. You’ll notice some seeds float and some sink. I tend to discard the floaters, assuming they might not be viable, but I keep the ones that sink. After the soak, drain the water.
- Alternative Scarification: Some folks like to lightly nick the seed coat with a sharp knife or rub it with sandpaper. The idea is to break through that hard outer layer just enough to let water in. Be careful not to damage the inner part of the seed.
I’ve found the boiling water method to be quite effective, often giving me a good germination rate. It’s a simple way to mimic what might happen naturally and help those seeds get ready to grow. After this initial preparation, the seeds will need a period of cold stratification, which we’ll cover next. This is another vital step to get them ready for planting. You can find more information on collecting tree and shrub seeds online if you need a hand.
It’s important to remember that not every seed will sprout. Nature has its own way of selecting, and sometimes seeds just aren’t viable. Don’t get discouraged if you don’t have 100% germination. Focus on the process and the seeds that do show signs of life.
Stratification Process: Helping Seeds Break Dormancy
Redbud seeds have a tough outer shell that keeps them from germinating right away. It’s like they’re built to wait for the right time. This natural dormancy is something we need to help them overcome if we want them to sprout. The process we use to do this is called stratification, and it mimics the natural conditions seeds experience over winter.
There are a couple of ways to go about this. One common method involves giving the seeds a period of cold, moist treatment. I usually take my collected seeds and mix them with a damp medium, like peat moss or vermiculite, in a plastic bag. Then, I pop that bag into the refrigerator for about three to four months. The key here is to keep the medium consistently moist, but not soaking wet. Too much water can lead to mold, which is definitely not what we want.
Another approach, which I’ve found quite effective, is to use the boiling water treatment. This method helps to soften that hard seed coat, making it easier for water to get in. I pour boiling water over the seeds and let them sit in it for about 24 hours, or sometimes even longer, until they plump up. After this, I’ll often still give them a cold stratification period in the fridge for a couple of months. It seems to give them a good head start.
Here’s a breakdown of the cold stratification method I often use:
- Prepare the medium: Mix equal parts peat moss or vermiculite with water until it’s damp, like a wrung-out sponge.
- Combine seeds and medium: Place your redbud seeds into the damp medium in a sealable plastic bag.
- Refrigerate: Store the bag in your refrigerator at around 35-40°F (1-4°C) for 90 to 120 days.
- Check moisture: Periodically check the bag to ensure the medium stays moist. Add a little water if it feels dry.
It’s important to remember that fungal growth can be a problem during stratification. Using a well-draining medium and not letting the seeds sit in standing water can help prevent this. Sometimes, a little bit of fungal activity can even be beneficial in breaking down the seed coat, but too much will ruin your seeds.
After the stratification period, the seeds should be ready for planting. You might notice some seeds have already started to swell or even sprout in the fridge. That’s a good sign! If you’re using the boiling water method, you might see a significant difference in seed size after soaking, which indicates the seed coat has been compromised and is ready for germination. This process is really about tricking the seed into thinking winter has passed, so it’s ready to grow when you plant it. For more on preparing seeds, you can look into seed scarification techniques.
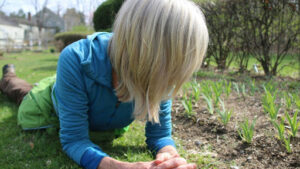
How to Plant a Redbud Tree: Choosing the Right Location
Alright, so you’ve got your redbud seeds ready to go, and you’re wondering where to put these future beauties. This is actually a pretty important step, and getting it right means a much happier tree down the road. I’ve learned that redbuds aren’t super picky, but they do have some preferences.
First off, think about sunlight. These trees really like a good amount of sun. Full sun to part shade is the sweet spot for them. If you’ve got a spot that gets at least six hours of direct sunlight a day, that’s probably a winner. Too much deep shade, and you might end up with a leggy tree that doesn’t bloom as much. I tried planting one in a really shady corner once, and it just sort of… existed. It didn’t really thrive.
Next up is drainage. Redbuds absolutely hate having their roots sit in soggy soil. It’s a recipe for root rot, and nobody wants that. So, when you’re looking at potential spots, try to find somewhere the water doesn’t just pool after a good rain. If your yard tends to hold water, you might need to amend the soil or even consider building up a little mound for the tree to sit on. It sounds like a lot, but it makes a big difference.
Here’s a quick rundown of what to look for:
- Sunlight: Aim for at least six hours of direct sun daily.
- Soil: Needs to drain well. No soggy feet for this tree!
- Space: Consider the mature size. Redbuds can get pretty wide, so give them room to spread out without crowding other plants or structures.
- Protection: Young trees can be a tasty snack for deer or rabbits, so if you have those critters around, think about a spot that offers a little natural protection or where you can easily add a tree guard.
When I’m picking a spot, I also like to think about how the tree will look throughout the year. Redbuds have those gorgeous spring flowers, but their heart-shaped leaves are nice in the summer, and some varieties even have a pretty fall color. So, placing it where you can enjoy it from a window or a patio is a good idea.
Remember, these trees are native to North America and are a fantastic alternative to some of the more invasive ornamental trees out there. You can find more information on redbud tree growing conditions to help you make the best choice for your yard.
Soil Preparation and Planting the Seeds Properly
After I’ve gotten my redbud seeds ready, the next step is getting them into the soil. It’s not too complicated, but doing it right makes a big difference. I usually grab some standard potting mix from the garden center. I don’t go for anything too fancy; a good, well-draining mix is what I look for. I’ll fill my seed starting pots or trays, leaving about half an inch of space at the top. This gives me room to add the seeds and a bit more soil on top without things spilling over.
Now, for the actual planting. I’ve found that pressing the seeds gently into the soil works best. This makes sure they have good contact with the soil, which is important for them to start taking up moisture. After placing the seeds, I add another thin layer of soil over them, just about an eighth to a quarter of an inch deep. Then, I give it a gentle pat down to firm it up a bit.
When it comes to how many seeds to plant per pot or cell, I tend to be a bit generous. I’ll put about three seeds in each small pot or cell. It’s a bit of a gamble, and not every seed will sprout, so this increases my chances of getting a few healthy seedlings. It’s kind of like Mother Nature scattering her own seeds – some take, some don’t.
I’ve learned that mimicking natural conditions is often the best approach. Redbud seeds have a tough coat, and they need a period of cold and moisture to break dormancy. Winter sowing, where you let nature handle the stratification process outdoors, is a method I’ve had a lot of success with.
For the planting medium itself, I like to add a bit of coarse sand to my potting mix. This really helps with drainage, which is super important to prevent the seeds from rotting. I’ve seen some people suggest using a mix with a bit of compost, but I stick to a simpler, grittier mix for seed starting. It seems to work well for me.
Here’s a quick rundown of how I prepare and plant:
- Fill pots with moistened potting mix, leaving about 1/2 inch of space.
- Place 2-3 redbud seeds per pot or cell.
- Cover seeds with a thin layer of soil (1/8″ – 1/4″).
- Gently firm the soil surface.
After planting, I usually cover the pots with a clear plastic dome or lid. I make sure to poke a few holes in it for air circulation and to let a little water in. This creates a mini-greenhouse effect, keeping the soil consistently moist while the seeds are waiting to germinate. I’ll then place these pots in a location where they can experience the natural winter conditions, which is key for the stratification process.
Watering, Mulching, and Early Care After Planting
Once your redbud seeds have sprouted and are showing their first true leaves, it’s time to focus on keeping them happy and healthy. Watering is key here. I’ve found that keeping the soil consistently moist, but not waterlogged, works best. Think of it like a wrung-out sponge – damp, but no puddles. Overwatering can lead to all sorts of fungal issues, which is something we definitely want to avoid with these young plants.
Mulching is another important step. Applying a layer of mulch around your seedlings helps retain soil moisture, keeps the soil temperature more stable, and also helps suppress weeds that can compete for resources. I usually aim for about 2 to 3 inches of mulch, making sure to keep it a few inches away from the base of the seedling itself. This prevents moisture from building up right against the stem, which can cause rot. You can use wood chips, shredded bark, or even compost for mulching. For more details on how to mulch properly, you can check out this guide on how to mulch a tree.
Here are a few things to keep in mind for early care:
- Watering Schedule: Water deeply when the top inch of soil feels dry. This might be every few days, depending on the weather.
- Sunlight Exposure: Young redbuds appreciate some shade, especially during the hottest part of the day. Too much direct, intense sun can scorch their delicate leaves.
- Protection: If you live in an area with late frosts, be prepared to offer some protection to your seedlings. A light frost cloth can make a big difference.
I’ve learned that patience is a virtue when growing from a seed. It’s easy to get excited and want to see rapid growth, but redbuds are often slow starters. Just keep providing consistent care, and they’ll reward you in time.
As the seedlings grow, you’ll want to monitor them for any signs of stress or pests. Early detection is always best. If you notice any yellowing leaves or spots, try to figure out the cause – it could be watering issues, nutrient deficiencies, or even a pest problem. Addressing these issues promptly will give your young redbuds the best chance to thrive.
Caring for Young Redbud Seedlings as They Grow
So, your little redbud seeds have finally sprouted! That’s fantastic. Now comes the part where we help these tiny plants get strong enough to really thrive. I usually let my seedlings grow in their starter pots until they’ve developed a few sets of ‘true leaves’ – those are the ones that look like actual leaves, not just the initial seed leaves.
Once they have those true leaves, I give them a good watering and gently pull them out of their cells. It’s important to replant them pretty quickly into larger containers. I find that using a standard potting mix works just fine, and I make sure there’s about half an inch of space at the top of the pot. Press the seedling in gently and cover the roots with a bit more soil, about an eighth to a quarter of an inch deep, and pat it down lightly. This gives them room to grow bigger over the summer.
Here’s a quick rundown of what I focus on:
- Watering: Keep the soil consistently moist, but not waterlogged. It’s better to water thoroughly less often than to keep the soil constantly soggy.
- Light: Young seedlings need bright light, but direct, harsh sun can scorch them. A spot with morning sun and afternoon shade is usually ideal.
- Protection: Even though redbuds are pretty tough, young seedlings can be a tasty snack for deer or rabbits. I often use little cages or tree shelters around them, especially if I know those critters are around.
- Fertilizing: I generally don’t fertilize seedlings right away. Once they’re a bit bigger and have been in their new pots for a few weeks, I might use a diluted liquid fertilizer, but it’s not always necessary if your potting mix has nutrients.
The goal is to get them strong and healthy before you think about moving them to their permanent spot.
It’s really about patience at this stage. You’re not trying to rush them. Just provide consistent care, and they’ll show you when they’re ready to get bigger and stronger. Think of it like raising a toddler – they need steady attention and the right environment to grow.
Common Mistakes to Avoid When Learning How to Plant a Redbud Tree
So, you’re thinking about how to plant a redbud tree? And, you’re trying to grow a redbud from seed? That’s awesome! It’s a really rewarding process, but I’ve definitely made a few missteps along the way that I want to share so you don’t have to.
One of the biggest things is skipping the stratification. Redbud seeds are tough little guys, and they need that cold, moist period to wake up. If you just toss them in the dirt without this step, you might be waiting a very, very long time, or worse, nothing happens at all. I learned this the hard way; I was so impatient to get them planted, I just put them straight into pots. Most of them never sprouted.
Another common pitfall is not giving the seeds enough time to germinate or the seedlings enough time to grow before transplanting. It’s tempting to move them to their final spot as soon as they look like little trees, but they’re still pretty fragile then. I usually wait until they have a few sets of ‘true leaves’ and are a decent size before I even think about moving them. Rushing this can really set them back.
Here are a few other things I’ve noticed:
- Planting too deeply: Redbud seeds don’t need to go very far down. About 1/8 to 1/4 inch is plenty. Burying them too deeply makes it harder for them to push through the soil.
- Overwatering or underwatering: This is a classic gardening challenge, right? Seeds and young seedlings need consistent moisture, but they also hate sitting in soggy soil. Finding that balance is key.
- Not considering the final location: Redbuds like sun, but they can handle some shade too. If you plant them in a spot that’s too shady, they’ll grow slower and might not flower as well. Also, make sure the soil drains well. Soggy roots are a death sentence.
- Ignoring pests: Young redbuds can be a tasty snack for deer and rabbits. I learned to protect my little saplings with cages or netting until they get a bit bigger and tougher.
It’s easy to get discouraged if your first few attempts don’t go perfectly. Growing from seed takes patience, and sometimes, you just have to try again. Don’t give up if you don’t see results right away; nature has its own timeline.
Finally, don’t be afraid to ask for advice or look up more information. There are tons of resources out there, and learning from others’ experiences can save you a lot of headaches. Happy planting!
Thinking about planting a Redbud tree? It’s a beautiful choice! But before you dig in, make sure you know the common pitfalls. We’ve put together a guide to help you avoid mistakes when planting your new tree. Want to learn more about keeping your trees healthy and vibrant? Visit our website for expert tips and services!
Frequently Asked Questions
How long does it take for a redbud seed to sprout?
It can take quite a while for redbud seeds to sprout. They often need a period of cold, moist conditions, like a winter, to break their dormancy. After that, germination can happen in the spring. Patience is key with these seeds!
Can I plant redbud seeds directly outside?
Yes, you can! A great way to get redbud seeds ready is to plant them outside in the fall. This way, they naturally experience the cold of winter, which helps them sprout when spring arrives. It’s like letting nature do the work for you.
What if my redbud seeds don’t sprout right away?
Don’t worry if your redbud seeds don’t sprout immediately. They have a tough outer coat that needs to be softened or broken down. Sometimes, they just need more time experiencing the cold, or you might need to try a process like soaking them in hot water first to help them along.
How should I prepare redbud seeds before planting?
To help redbud seeds sprout, I usually soak them in hot water for about 24 hours. Another method is to put them in a damp paper towel inside a plastic bag and keep them in the refrigerator for a month or two. This cold treatment mimics winter and helps them wake up.
When is the best time to plant redbud seedlings in the ground?
I find that early fall is the best time to move your young redbud trees to their permanent spot. The weather is cooler then, so the tree won’t need as much water. Plus, the roots have a chance to grow deeper before winter really sets in, helping the tree get established.
How can I protect young redbud seedlings?
Young redbud seedlings can be tasty snacks for deer and rabbits. To keep them safe, I recommend using a protective cage or a tree shelter around them. This helps ensure they grow strong without being nibbled on.