
How to Collect and Grow American Basswood Seeds at Home
- July 19, 2025
- By Jason Sinclair
Growing American Basswood from seed can be a rewarding project for any home gardener. These trees, also known as Tilia americana, are native to North America and offer many benefits, from their fragrant flowers to their strong wood. If you’re interested in adding this beautiful tree to your landscape, understanding how to properly collect and grow American basswood seeds is key. This guide will walk you through each step, from finding the right seeds to caring for your new saplings.
Key Takeaways
- Collect American Basswood seeds in early September, when they’re grayish-green to light brown, to help with germination.
- Remove the seed coat by processing seeds in a food processor for about a minute; this helps with germination.
- Basswood seed germination can be unpredictable; most seeds need at least two years to sprout, sometimes more.
- Keep stratified seeds in plastic bags until they sprout, then plant them in prepared beds or native soil.
- Protect young basswood seedlings from deer, as deer like to eat them.
Introduction to American Basswood (Tilia americana)
The American Basswood, scientifically known as Tilia americana, is a magnificent tree native to eastern North America. It’s also called American linden. This tree is valued for its fragrant flowers, soft wood, and ecological importance. It’s a pretty cool tree, honestly. It’s not just another tree in the forest; it plays a vital role in the ecosystem and offers various benefits to humans and wildlife. You can even eat the leaves.
The American Basswood is a large deciduous tree that can grow to impressive heights, often reaching 60 to 80 feet tall. Its canopy provides shade and shelter, while its flowers attract pollinators and its seeds provide food for birds and small mammals.
Here’s why you might want to grow one:
- Provides excellent shade in the summer.
- Attracts bees and other pollinators to your yard.
- Offers a source of food and shelter for wildlife.
- The wood is easy to work with, making it great for carving.
Growing an American basswood sapling from seed can be a rewarding experience, allowing you to contribute to the conservation of this important species and enjoy its beauty for generations to come. Plus, you get bragging rights for growing a tree from scratch.
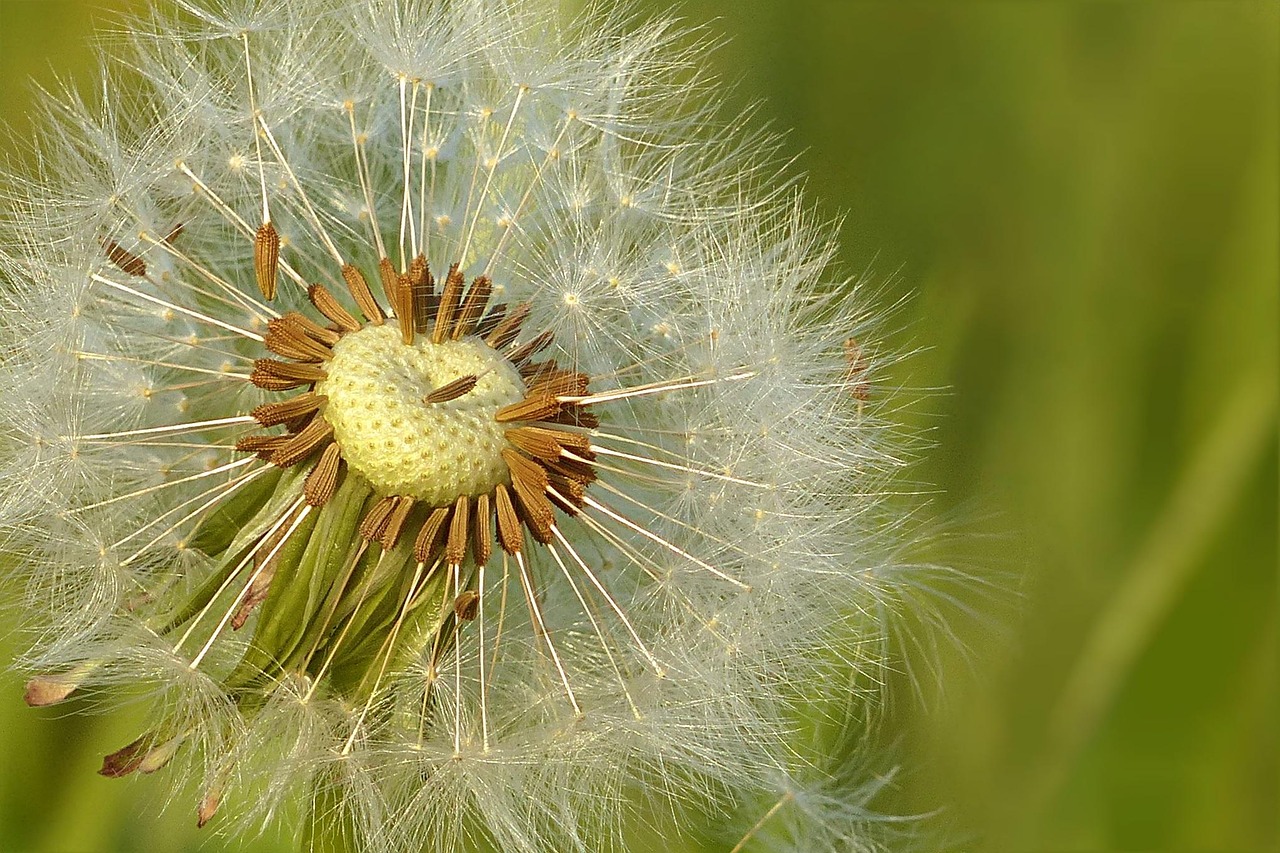
When to Collect Basswood Seeds
Timing is really important when you’re trying to gather basswood seeds. You want to get them at just the right moment to have the best chance of success. Start keeping an eye on the trees in early September. That’s when the seeds usually start to mature. The ideal time to collect is generally early autumn, before the seeds have a chance to completely dry out on the tree.
One thing to watch for is the color change. The seeds will shift from a grayish-green to a light brown as they ripen. If you wait too long, the seeds can develop a deep dormancy, which makes them harder to germinate. So, it’s better to grab them a little early rather than too late. You can either strip the seeds right off the branches or shake the branches over a sheet to collect them. I find shaking works pretty well, especially if you’re dealing with a big tree.
Collecting seeds early can increase your chances of getting them to sprout the following spring. Letting them sit on the tree too long can cause them to go into a deeper state of dormancy, which means they’ll need a longer period of stratification before they’re ready to grow.
Here’s a quick checklist to keep in mind:
- Start checking trees in early September.
- Look for a color change from grayish-green to light brown.
- Collect seeds before they completely dry out.
- Consider shaking branches to gather seeds efficiently.
After you’ve collected the seeds, you’ll want to remove the wings and petioles. Rubbing them over a screen can help with this. This reduces the bulk and makes the seeds easier to handle. Plus, it’s just a good way to get them ready for the next steps in the process. Don’t forget to check out seed-ripening indicators to help you determine when to harvest.
Identifying Seed Ripe Indicators
Knowing when to harvest your American Basswood seeds is key to successful germination. It’s not just about picking them at any old time; you need to look for specific signs that indicate the seeds are mature and ready to be collected. This usually happens in late summer or early fall, but the exact timing can vary depending on your location and the specific weather conditions of the year. Keep a close eye on your trees during this period.
- Color Change: The bracts (the leaf-like structures attached to the seed clusters) will start to turn from a vibrant green to a yellowish-brown color. This is one of the first and most obvious signs that the seeds are maturing.
- Seed Hardness: Gently squeeze a few seeds. Ripe seeds will feel firm and hard to the touch. If they still feel soft or squishy, they’re not ready yet.
- Easy Detachment: When the seeds are ripe, they should detach relatively easily from the tree. Give a gentle tug on a seed cluster; if it comes off without much resistance, it’s a good sign. If you’re interested in growing linden trees, you’ll want to pay attention to these details.
Observing these indicators will help you gather seeds at their peak ripeness, increasing your chances of successful germination and healthy seedling development. It’s a bit of a waiting game, but patience pays off.
It’s also worth noting that American Basswood seeds don’t all ripen at the same time. You might find some seeds that are ready while others are still developing. It’s best to make multiple collections over a few weeks to ensure you get a good batch of viable seeds. This approach maximizes your chances of getting a good yield. Also, remember that seed cleaning is recommended to improve germination. The seed coat is thought to contain a chemical inhibitor.
Best Methods to Harvest Seeds
Harvesting American Basswood seeds at the right time and with the proper technique is important for successful propagation. It’s not rocket science, but a little care goes a long way. You want to make sure you’re getting viable seeds without damaging the tree.
Timing is everything; aim to collect seeds when they are mature but before they naturally disperse. This usually happens in the fall, but keep an eye on your local trees to get the timing just right.
Here’s a breakdown of some effective harvesting methods:
- Hand-picking: This is the simplest method. Just pluck the seed clusters from the tree by hand. It works best for smaller trees or lower branches.
- Clipping: Use pruning shears or loppers to cut off entire branches with seed clusters. This is useful for higher branches, but be mindful of the tree’s overall shape and health. Don’t go overboard.
- Shaking: For larger trees, you can try shaking the branches to dislodge the seeds. Spread a tarp underneath to catch them. This method is less precise, but it can be efficient.
When harvesting, always prioritize the health of the tree. Avoid stripping all the seeds from a single tree, and never damage the branches excessively. Sustainable harvesting ensures the tree can continue to produce seeds for years to come.
After harvesting, you’ll need to separate the seeds from the bracts, which we’ll cover in the next section. But for now, focus on getting those seeds safely and efficiently.
Consider the arborvitae roots when planting near other trees to avoid competition for resources.
Separating Seeds from Bracts
Okay, so you’ve got your basswood seeds, complete with those papery bracts. Now what? Getting the seeds separated from the bracts is a key step. It’s not super difficult, but it does take a little patience. The bracts themselves aren’t harmful, but removing them makes handling and sowing the seeds much easier. Plus, it helps with viability testing, which we’ll get to later.
The goal here is to gently detach the seeds without damaging them.
Here’s how I usually tackle it:
- Manual Separation: This is the most straightforward method. Simply pluck the seeds from the bracts by hand. It’s a bit tedious if you have a huge batch, but it gives you the most control.
- Gentle Threshing: For larger quantities, you can try a gentle threshing method. Place the seeds and bracts in a burlap sack or a pillowcase. Gently rub the material together. The friction will help to separate the seeds. Be careful not to be too rough, or you might damage the seeds.
- Screening: After threshing, use a screen or sieve with appropriately sized mesh to separate the seeds from the bracts and other debris. The seeds should fall through, while the larger bracts remain behind.
I’ve found that a combination of these methods works best. I usually start with gentle threshing to loosen things up, then use manual separation to get the last few stubborn seeds. Screening helps to remove any remaining debris.
After separating the seeds, give them a good look. Discard any that appear damaged or discolored. Now you’re ready to move on to the next step: testing for viability.
Testing Seed Viability
Before investing time and resources into sowing your American Basswood seeds, it’s wise to check their viability. This simple step can save you from disappointment later on. There are a couple of methods you can use to assess whether your seeds are likely to germinate.
The Water Test
This is a straightforward method to get a quick estimate. Here’s how it works:
- Place a sample of your seeds (at least 20-30) in a container of water.
- Let them soak for about 24 hours.
- After 24 hours, observe which seeds sink and which float.
Generally, seeds that sink are more likely to be viable, while those that float are often empty or non-viable. However, this isn’t a foolproof method, as some viable seeds may still float due to air pockets.
The Cut Test
For a more definitive assessment, you can perform a cut test. This involves physically examining the inside of the seed.
- Take a sample of seeds (again, 20-30 is a good number).
- Carefully cut each seed open with a sharp knife or razor blade.
- Inspect the inside of the seed. A viable seed will typically have a firm, white, or cream-colored embryo. If the inside is shriveled, dark, or mushy, the seed is likely non-viable.
It’s important to remember that even with the best testing methods, you won’t achieve 100% accuracy. Seed viability can be affected by various factors, including storage conditions and the age of the seeds. However, testing gives you a reasonable expectation of germination success.
Germination Test
This is the most reliable method, although it requires more time and effort. It involves simulating germination conditions to see how many seeds sprout.
- Take a representative sample of your seeds (50-100 seeds for a more accurate result).
- Place the seeds between moist paper towels or coffee filters.
- Put the paper towels in a plastic bag or container to maintain humidity.
- Store the bag in a warm place (around 68-77°F or 20-25°C).
- Check the seeds regularly for germination, keeping the paper towels moist.
After a few weeks (basswood seeds can be slow to germinate, so be patient), count the number of seeds that have sprouted. The percentage of germinated seeds gives you a good indication of the overall viability of your seed lot.
Breaking Seed Dormancy
American Basswood seeds have a tough time sprouting without a little help. They possess both a hard seed coat and internal dormancy, meaning they won’t just germinate readily even under ideal conditions. You need to mimic the natural processes that would occur over winter to trigger germination. This usually involves a period of cold, moist stratification.
Stratification: The Key to Success
Stratification is essentially tricking the seed into thinking it has gone through winter. This process breaks down the germination inhibitors within the seed and softens the hard seed coat. Without proper stratification, your basswood seeds are unlikely to sprout, no matter how carefully you plant them.
Here’s a basic overview of the stratification process:
- Moisten: Place the seeds in a damp medium like peat moss, vermiculite, or even just a paper towel.
- Chill: Store the seeds in a refrigerator at around 35-40°F (2-4°C) for an extended period.
- Monitor: Check the seeds periodically to ensure the medium stays moist but not waterlogged.
Duration of Cold Stratification
Basswood seeds typically require a long period of cold stratification. The exact duration can vary, but generally, a period of 60-90 days is recommended. Some sources even suggest longer periods, up to 120 days, for optimal results. It’s better to err on the side of longer stratification, as it’s unlikely to harm the seeds.
Alternative Scarification Methods
While cold stratification is the primary method for breaking dormancy, some growers also use scarification to help soften the seed coat. Scarification involves physically abrading the seed coat to allow moisture to penetrate more easily. This can be done by gently rubbing the seeds with sandpaper or nicking them with a knife. However, be very careful not to damage the embryo inside the seed. Scarification is often used in conjunction with stratification to improve germination rates. You can also try planting arborvitae in the fall for cold stratification.
It’s important to remember that basswood seed germination can be unpredictable. Even with proper stratification and scarification, not all seeds will germinate. Be patient and don’t be discouraged if you don’t see results immediately. Sometimes, it can take several months for the seeds to sprout.
Dealing with Hard Seed Coats
Basswood seeds have a very tough outer layer. This is why scarification is sometimes used. You can try soaking the seeds in warm water for 24 hours before stratification to help soften the seed coat. This allows moisture to penetrate more easily during the cold period. Remember to change the water every 12 hours to prevent the growth of mold or bacteria. This is a simple step that can significantly improve your seed germination success rate.
Stratification Methods Explained
Okay, so you’ve got your basswood seeds, and you know they need stratification. But what does that even mean, right? Basically, stratification is tricking the seed into thinking it’s been through winter. American Basswood seeds have a tough seed coat and internal dormancy that prevents them from sprouting right away. They need a period of cold, moist conditions to break this dormancy. Think of it as nature’s way of making sure the seeds don’t sprout in the fall, only to be killed by the first frost.
There are a couple of ways to do this, and honestly, neither is super complicated. It just takes a little planning and patience.
Cold Stratification in the Refrigerator
This is probably the most common method, and it’s pretty straightforward. You’re essentially creating a mini-winter for your seeds in your fridge. Here’s how it goes:
- Gather your supplies: You’ll need your basswood seeds, some damp (not soaking wet!) paper towels or peat moss, and a plastic bag or container.
- Moisten the medium: Dampen your paper towels or peat moss. You want it moist, but not dripping. If you squeeze it, only a drop or two of water should come out.
- Mix seeds and medium: Place your basswood seeds in the damp medium and mix them gently. Make sure the seeds are in contact with the moisture.
- Seal and refrigerate: Put the mixture in a plastic bag or container and seal it. Label the bag with the date and the type of seed. Place it in your refrigerator (not the freezer!) at a temperature between 33°F and 41°F (0.5°C and 5°C).
- Monitor and maintain: Check the seeds every couple of weeks to make sure the medium is still moist. If it’s drying out, add a little water. Also, keep an eye out for any mold or fungus. If you see any, remove the affected seeds immediately.
- Stratify for the right duration: Basswood seeds typically need 60-90 days of cold stratification. Mark your calendar.
It’s important to keep a close eye on your seeds during stratification. Too much moisture can lead to mold, while too little can prevent the seeds from properly breaking dormancy. Finding the right balance is key.
Outdoor Stratification
If you live in an area with cold winters, you can let nature do the work for you. This method is a bit less controlled, but it can be very effective.
- Prepare a planting bed or container: Choose a spot in your garden or a container that is protected from strong winds and direct sunlight. The soil should be well-draining.
- Sow the seeds: Plant the basswood seeds about 1/4 to 1/2 inch deep in the soil.
- Mulch: Cover the planting area with a layer of mulch, such as straw or leaves. This will help to insulate the soil and retain moisture.
- Wait: Let nature take its course. The seeds will be exposed to the natural cold and moisture fluctuations of winter. They should germinate in the spring.
Outdoor stratification can be a bit riskier than refrigerator stratification, as you have less control over the conditions. However, it can also be more effective, as the seeds are exposed to a wider range of temperatures and moisture levels. The key is to choose a location that is protected from extreme conditions and to monitor the seeds regularly.
Scarification (Optional, but Recommended)
While not strictly stratification, scarification can significantly improve germination rates. Scarification involves gently scratching or nicking the seed coat to allow water to penetrate more easily. You can do this by:
- Using sandpaper: Gently rub the seeds between two pieces of fine-grit sandpaper.
- Nicking with a knife: Carefully nick the seed coat with a sharp knife or razor blade. Be careful not to damage the inside of the seed.
- Soaking in hot water: Pour hot (not boiling) water over the seeds and let them soak for 24 hours. This can help to soften the seed coat.
Scarification is especially helpful for seeds with very hard seed coats. It’s an extra step, but it can make a big difference in your germination success.
Preparing Seed Beds or Containers
Okay, so you’ve got your basswood seeds ready to go. Now it’s time to think about where they’re going to go. You have a couple of options here: seed beds directly in the ground or containers. Each has its own set of pros and cons, so let’s break it down.
Choosing Between Seed Beds and Containers
Deciding whether to use a seedbed or containers depends on your situation. Got a good spot in your yard with decent soil? A seedbed might be the way to go. Limited space, or want more control over the environment? Containers are your friend.
- Seed Beds: These are great if you’re planting a larger number of seeds and have the space. You’ll need to prepare the soil well, making sure it’s loose and free of weeds. The downside? You’re at the mercy of the weather and local critters.
- Containers: Containers give you more control. You can move them around to chase the sun, protect them from frost, and keep a closer eye on watering. Plus, it’s easier to start seeds indoors if you want a head start. But you’ll need to transplant later, and it can be more work if you’re dealing with a lot of seeds.
Soil Preparation for Seed Beds
If you’re going the seedbed route, soil prep is key. You can’t just toss the seeds in and hope for the best. Here’s what you need to do:
- Clear the Area: Remove any grass, weeds, rocks, and debris from the area where you plan to plant. A clean slate is essential.
- Loosen the Soil: Use a garden fork or tiller to loosen the soil to a depth of at least 6-8 inches. This helps with drainage and allows the roots to penetrate easily.
- Amend the Soil: This is where you add organic matter like compost or well-rotted manure. This improves soil fertility, drainage, and water retention. Work it in thoroughly.
- Level the Surface: Rake the area smooth to create a level surface for planting. This ensures even watering and germination.
Selecting and Preparing Containers
For containers, you have tons of options. From small starter pots to larger nursery pots, the choice is yours. Just make sure they have drainage holes.
- Container Size: Start with smaller pots (2-3 inches) for initial sowing. You can transplant to larger containers as the seedlings grow.
- Potting Mix: Don’t use garden soil in containers. It compacts too easily and doesn’t drain well. Use a good-quality seed-starting mix or potting mix. These are specifically formulated for seedlings.
- Cleaning: If you’re reusing containers, wash them thoroughly with soap and water to prevent the spread of diseases.
Preparing your seed beds or containers properly sets the stage for successful germination and healthy seedling growth. It’s an investment of time that pays off big time down the road.
Soil pH Considerations
Basswood trees generally prefer slightly acidic to neutral soil. A pH range of 6.0 to 7.0 is ideal. You can test your soil pH using a soil testing kit, which you can find at most garden centers. If your soil is too alkaline, you can amend it with sulfur or peat moss to lower the pH. If it’s too acidic, add lime to raise the pH. Getting the pH right can really help with nutrient uptake and overall plant health.
| Amendment | Effect on pH | Application Rate (per 10 sq ft) | Notes |
| Sulfur | Lowers pH | 1-2 lbs | Use sparingly, retest after application |
| Peat Moss | Lowers pH | 2-3 cubic feet | Mix thoroughly into the soil |
| Lime | Raises pH | 2-4 lbs | Use dolomitic lime for a magnesium boost |
Proper soil preparation is the foundation for healthy basswood seedlings.
Sowing Basswood Seeds
After all the preparation, it’s time to get those seeds in the ground. Sowing Americanbasswood seeds correctly is key to successful germination and healthy Americanbasswood seedlings.
Timing is Everything
While fall sowing mimics nature, spring sowing after stratification is also viable. Consider your local climate and the length of your growing season. Fall sowing allows natural stratification, but exposes seeds to harsh winter conditions and potential predation. Spring sowing gives you more control, but requires careful monitoring.
Sowing Depth and Spacing
Proper depth and spacing are important for seedling development.
- Sow seeds about 1/4 to 1/2 inch deep.
- Space seeds about 1-2 inches apart in rows.
- If sowing in containers, use one to two seeds per cell.
Soil Considerations
Basswood prefers well-draining soil that is rich in organic matter. A slightly acidic to neutral pH is ideal. Amend heavy clay soils with compost or other organic materials to improve drainage. Avoid overly compacted soils, as they can hinder root development.
Ensure the soil is consistently moist but not waterlogged. Overwatering can lead to fungal diseases and seed rot, while underwatering can cause the seeds to dry out and fail to germinate. Regular monitoring of soil moisture is essential, especially during the initial stages of germination.
Direct Sowing vs. Container Sowing
Both direct sowing and container sowing have their advantages. Direct sowing eliminates the need for transplanting, but can be more susceptible to environmental factors. Container sowing provides more control over the growing environment, but requires transplanting seedlings later on. Choose the method that best suits your resources and preferences.
Post-Sowing Care
After sowing, gently water the seedbed or containers. Mulch can help retain moisture and suppress weeds. Protect the area from excessive sunlight and strong winds. Monitor for pests and diseases, and take appropriate action if necessary. Patience is key, as basswood seeds can take several weeks or even months to germinate.
Seedling Care
So, you’ve successfully germinated your American basswood seeds – congratulations! Now comes the crucial part: ensuring those tiny seedlings thrive. It’s a bit like taking care of a newborn; they need constant attention and the right conditions to grow strong.
Watering
Watering is key, but it’s a balancing act. Overwatering can lead to root rot, which is a death sentence for seedlings. Underwatering, on the other hand, will cause them to dry out and wither. The goal is to keep the soil consistently moist, but not soggy. Check the soil moisture daily by sticking your finger about an inch into the soil. If it feels dry, it’s time to water. When you do water, do it thoroughly, ensuring the water drains out of the bottom of the container. This helps prevent salt buildup in the soil.
Light
Basswood seedlings need plenty of light, but direct sunlight can be too harsh, especially for young plants. Aim for bright, indirect light. If you’re growing them indoors, a spot near an east-facing window is ideal. You might need to supplement with a grow light if you don’t have enough natural light. Watch for signs of insufficient light, such as leggy growth (long, spindly stems) or pale leaves. If you see these, move the seedlings to a brighter location or increase the amount of time they’re under the grow light. Remember that spring seedlings need sunlight to grow.
Fertilizing
Seedlings need nutrients to grow, but too much fertilizer can burn their delicate roots. Start fertilizing a few weeks after germination, using a diluted liquid fertilizer specifically formulated for seedlings. A balanced fertilizer with an N-P-K ratio of 10-10-10 is a good choice. Dilute the fertilizer to half strength and apply it every two to four weeks. Watch for signs of over-fertilization, such as yellowing or browning leaf tips. If you see these, stop fertilizing and flush the soil with water to remove excess salts.
Pest and Disease Control
Seedlings are vulnerable to pests and diseases, so it’s important to be vigilant. Check your seedlings regularly for signs of trouble, such as aphids, spider mites, or fungal infections. If you spot any pests, treat them promptly with an appropriate insecticide or miticide. For fungal diseases, improve air circulation around the seedlings and apply a fungicide if necessary. Prevention is always better than a cure, so keep your growing area clean and free of debris. Also, avoid overwatering, as this can create conditions that favor fungal growth.
One thing I learned the hard way is that good air circulation is super important. I had a batch of seedlings get hit with damping-off disease because I didn’t have enough airflow. Now I always make sure to have a small fan running nearby to keep the air moving. It makes a huge difference.
Hardening Off
Before transplanting your basswood saplings outdoors, you’ll need to harden them off. This process gradually acclimates the seedlings to outdoor conditions, reducing the risk of shock. Start by placing the seedlings outdoors in a sheltered location for a few hours each day, gradually increasing the amount of time they spend outside. After a week or two, they should be able to tolerate full sun and wind. Once they’re hardened off, they’re ready to be transplanted into their permanent location.
Transplanting Saplings
Okay, so you’ve babied your basswood seedlings, and they’re starting to look like actual trees. Now what? It’s time to think about moving them to their permanent homes. This step is crucial, and getting it right sets your trees up for a long and healthy life. Don’t rush it; proper planning and execution are key.
Timing is Everything
The best time to transplant basswood saplings is during their dormant period, either in early spring before new growth begins or in late fall after they’ve shed their leaves. Avoid transplanting during the heat of summer, as this can stress the young trees and reduce their chances of survival. I usually aim for a cool, overcast day to minimize shock. Transplanting during dormancy gives the saplings a chance to establish their root systems before the demands of new growth kick in.
Preparing the New Site
Before you even think about digging up your saplings, get their new homes ready. Basswoods like well-drained soil and plenty of sunlight, although they can tolerate some shade. Dig a hole that’s twice as wide as the root ball and just as deep. This gives the roots room to spread out. Mix some compost into the soil you removed from the hole; this will provide extra nutrients and improve drainage. Make sure the location you choose has enough space for the tree to mature; these guys can get big.
The Transplanting Process
Carefully dig up the sapling, trying to keep as much of the root ball intact as possible. Gently loosen the roots if they’re tightly bound. Place the sapling in the prepared hole, making sure the top of the root ball is level with the ground. Backfill the hole with the amended soil, tamping it down gently to remove air pockets. Water the newly transplanted sapling thoroughly. Consider adding a layer of mulch around the base of the tree to help retain moisture and suppress weeds. I like to use wood chips or shredded bark.
Post-Transplant Care
Transplanted saplings need extra attention for the first year or two. Water them regularly, especially during dry spells. Check for signs of stress, such as wilting or yellowing leaves. Protect them from pests and diseases. You might want to stake the sapling to provide support, especially if you live in an area with strong winds. Remove any stakes after a year or two, once the tree is established. Keep an eye on the young leaves to ensure they are healthy.
Transplanting is stressful for trees. Minimizing that stress is the name of the game. Keep the roots moist, handle the sapling gently, and provide plenty of water after transplanting. A little extra care in the beginning can make a big difference in the long run.
Troubleshooting Common Issues
- Transplant shock: This is common and can cause wilting or leaf drop. Keep the sapling well-watered and protected from extreme weather. It should recover in time.
- Poor drainage: Basswoods don’t like soggy soil. If the planting site doesn’t drain well, consider amending the soil with more organic matter or choosing a different location.
- Pest infestations: Keep an eye out for common pests like aphids or Japanese beetles. Treat infestations promptly with appropriate insecticides or natural remedies.
Long‑Term Maintenance & Troubleshooting
Okay, so you’ve babied your American Basswood seedlings, transplanted them, and now they’re well, trees. But the journey doesn’t end there. Long-term care is key to ensuring your basswoods thrive. Plus, you might run into some snags along the way. Let’s talk about keeping your trees happy and what to do if things go south.
Regular Monitoring
Keep a close eye on your basswood trees, especially during the first few years after transplanting. Look for signs of stress, disease, or pest infestations. Early detection is crucial for effective treatment. I usually do a quick walk-around every few weeks, just to make sure everything looks okay. It’s like a little tree check-up!
Watering and Fertilizing
Young basswood trees need consistent moisture, especially during dry spells. Once established, they’re fairly drought-tolerant, but don’t neglect them completely. Fertilize in early spring with a balanced fertilizer, following the package instructions. Don’t overdo it, though; too much fertilizer can harm the tree.
Pruning
Prune your basswood trees in late winter or early spring to remove dead, damaged, or crossing branches. This helps improve air circulation and sunlight penetration, promoting healthy growth. Also, it’s a good idea to prune for shape if you want a specific look. I like to keep the canopy open so the birds have plenty of room to fly through.
Pest and Disease Management
Basswood trees can be susceptible to certain pests and diseases. Here’s a quick rundown:
- Aphids: These tiny insects suck sap from the leaves, causing them to curl and distort. Treat with insecticidal soap or neem oil.
- Japanese Beetles: These beetles can skeletonize the leaves. Handpick them off the tree or use an appropriate insecticide.
- Powdery Mildew: This fungal disease appears as a white, powdery coating on the leaves. Improve air circulation and apply a fungicide if necessary.
Prevention is always better than a cure. Make sure your trees have adequate spacing, good air circulation, and are not stressed by drought or poor soil conditions. Healthy trees are more resistant to pests and diseases.
Addressing Common Problems
Sometimes, things just don’t go as planned. Here are a few common problems you might encounter and how to deal with them:
- Yellowing Leaves: This could be a sign of nutrient deficiency, overwatering, or pest infestation. Check the soil drainage, test the soil pH, and inspect the leaves for pests.
- Stunted Growth: This could be due to poor soil conditions, lack of sunlight, or root damage. Amend the soil with compost, ensure the tree is getting enough sunlight, and protect the roots from damage.
- Branch Dieback: This could be caused by disease, insect damage, or physical injury. Prune away the dead branches and investigate the underlying cause.
Protecting from Environmental Stress
Basswood trees are generally hardy, but they can still be affected by environmental stress. Protect them from extreme weather conditions, such as strong winds and heavy snow. You might need to stake young trees to prevent them from being blown over. Also, consider wrapping the trunks of young trees with burlap in winter to protect them from sunscald and rodent damage.
Long-Term Soil Health
Maintaining healthy soil is crucial for the long-term health of your basswood trees. Mulch around the base of the trees with organic matter, such as wood chips or shredded bark. This helps retain moisture, suppress weeds, and improve soil fertility. Avoid compacting the soil around the trees, as this can restrict root growth. I like to add a fresh layer of mulch every spring. It makes the trees look nice and keeps the soil happy.
Wildlife Considerations
Basswood trees are attractive to wildlife, which can be both a blessing and a curse. Deer might browse on the young trees, so you might need to protect them with fencing. On the other hand, the flowers attract pollinators, and the seeds provide food for birds and small mammals. It’s all part of the ecosystem.
Replacement Strategies
Even with the best care, trees can sometimes die. If a basswood tree dies, remove it promptly to prevent the spread of disease or pests. Consider replacing it with another basswood tree or a different species that is well-suited to your local conditions. It’s always sad to lose a tree, but it’s also an opportunity to plant something new.
Keeping things in good shape over time and fixing problems when they pop up is super important. If you want to make sure everything keeps working well, or if you run into a snag, don’t hesitate to reach out. We’re here to help you every step of the way. Just head over to our website to get a free estimate.
Frequently Asked Questions
What is American Basswood?
American Basswood (Tilia americana) is a large, fast-growing deciduous tree native to North America. It is also known as American linden. Its wood is light and easy to work with, and it is known for its fragrant flowers that attract bees. Basswood trees can live for over 200 years.
When is the best time to collect Basswood seeds?
Basswood seeds are typically ready for collection in early September. The seed color changes only slightly from grayish-green to light brown. Harvesting seeds early can improve their chances of sprouting in the first spring.
What are the best methods for harvesting Basswood seeds?
You can gather seeds by stripping them from the branches or by shaking the tree and letting them fall onto a sheet placed below. This makes the collection easier and more efficient.
How do I separate the seeds from their protective coverings?
After collecting, it is important to remove the papery wings and stems from the seeds. Rubbing the seeds over a screen can help to clean them, making them easier to handle and store. This also reduces the overall bulk.
Why is seed cleaning important for Basswood, and how is it done?
Basswood seeds have a hard outer shell and a thin inner seed coat that can prevent them from sprouting. To improve germination, it is recommended to clean the seeds. Some sources suggest processing them in a food processor for a short time to remove the seed coat, which is believed to contain a chemical that stops growth.
What is seed dormancy, and how is it overcome in Basswood seeds?
Basswood seeds often have a deep dormancy, meaning they need specific conditions to sprout. Cold and moist stratification is necessary to break this dormancy. This process mimics the natural winter conditions the seeds would experience outdoors.
How long does it typically take for Basswood seeds to germinate?
Germination of Basswood seeds can be unpredictable, and it is rare for all seeds to sprout at the same time. Most seeds will take at least two years to germinate, but some may sprout even three or more years after collection. Patience is key when growing Basswood from seed.
How do deer impact Basswood seedling reproduction?
Deer are known to eat young Basswood plants. If there are many deer in your area, they can prevent new seedlings from growing. It is important to protect young plants from deer browsing until they are tall enough to be out of reach.